
Windows 11 Running Slow? Disable these Windows Services
Windows 11 is the latest operating system that delivers a modern, smooth, and intuitive computing experience with a focus on high productivity, creativity, and security. If you are using Windows 11, like other Windows versions, it runs with many background services and apps, many of which are not necessary for all users. These non-essential services may be consuming RAM, CPU cycles, and battery life, which could be unknowingly slowing down your PC, which you have never used before.
But here is the good news: you can easily disable or uninstall them and give your PC the extra space to boost its performance. If you are using an old PC that’s running slow or you want to maximize the performance of your new PC, you should consider disabling these Windows services or apps that run in the background all the time.
In this blog, I will describe the best method to disable Windows Services for high performance and security of your PCs.
⚠️ Important note:
Some Windows services are necessary for the security and stability of your system. If you disable critical services, it may interrupt the functionality of your PCs. So before disabling services, you should understand exactly what impact it will have, or alternatively, make a system restore point to revert the changes if needed.
Why Disable Certain Windows Services in Windows 11?
Windows 11 runs multiple background services by default. While some of them are crucial for system operation and other services or apps are unnecessary for some users. Some services are designed for business environments, remote management, or specific hardware features. Disabling unnecessary services can:
- Enhance overall system speed
- Improve startup time
- Free up system resources like RAM and CPU usage
- Minimize background processes
Disable Windows Update Delivery Optimization Service
If you have noticed Windows Update Delivery Optimization in Windows 11 settings, it is an inbuilt Windows feature that allows your PCs to download or upload Windows or app updates either on your computer network or over the internet. Microsoft has designed this feature to download the updates from Microsoft servers, which use a combination of cloud infrastructure and P2P networks to download updates faster and reduce bandwidth consumption.
If you think this is not what you use while operating your computer or installing Windows updates, it is generally safe to disable this service to reduce bandwidth usage. While disabling it won’t stop Windows Updates, it will prevent your PC from downloading updates from other PCs or uploading parts of updates to other PCs.
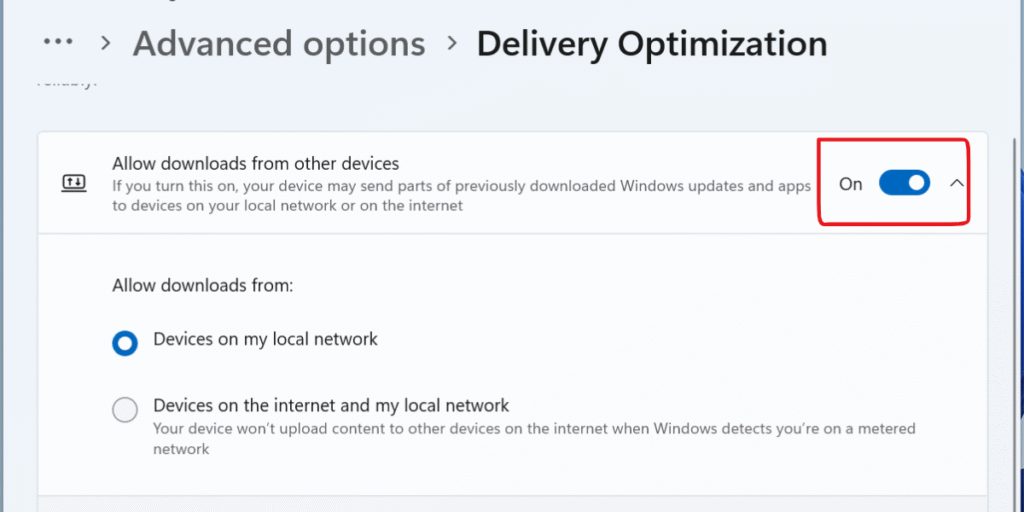
If you want to disable this service first Go to Settings > Windows Update > Advanced Options > Delivery Optimization and Toggle “Allow downloads from other PCs” to Off.
Or you can disable going through service :
- Press Win + R, type services.msc, press Enter.
- Find Delivery Optimization, right-click → Properties.
- Set Startup type to Disabled, then click Stop.
Note :If you disable delivery optimization on your PCs, it may slow down the Windows updates when Microsoft’s servers encounter heavy traffic, and it will also prevent your PC from helping to speed up updates for other devices on your local network.
Disable Remote Desktop Services
If you want to disable remote desktop features, Here’s how:
- Open the Services app by typing “Services” in the Start menu search bar.
Locate the following services:
- Remote Desktop Configuration
- Remote Desktop Services
- Remote Desktop User Mode Port Redirector
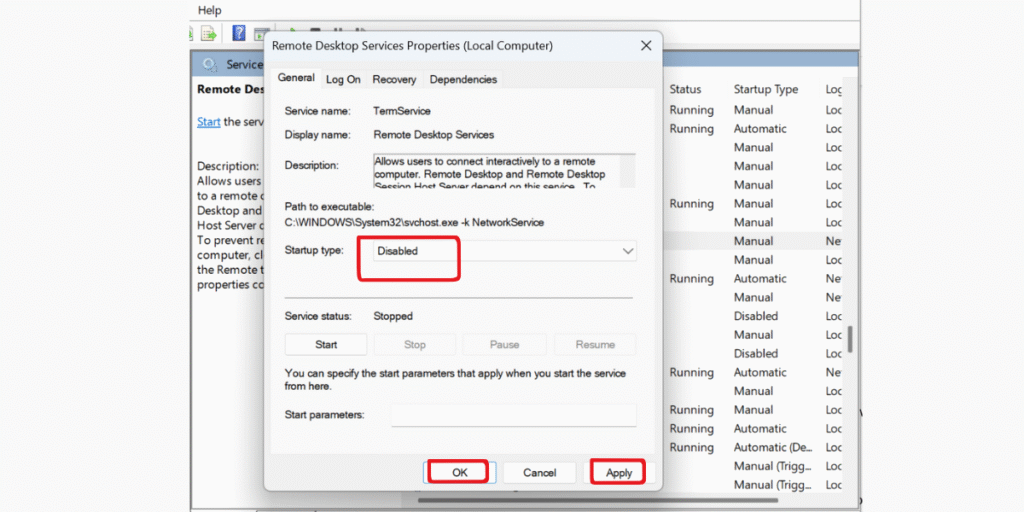
- Right-click on each service and select Properties.
- Change the Startup type to Disabled.
- Click Apply and OK.
Note: Disabling Remote Desktop Services is safe if you don’t use Remote Desktop. If you will disable,it prevents any remote access to your PC via RDP.
Disable Windows Search Service
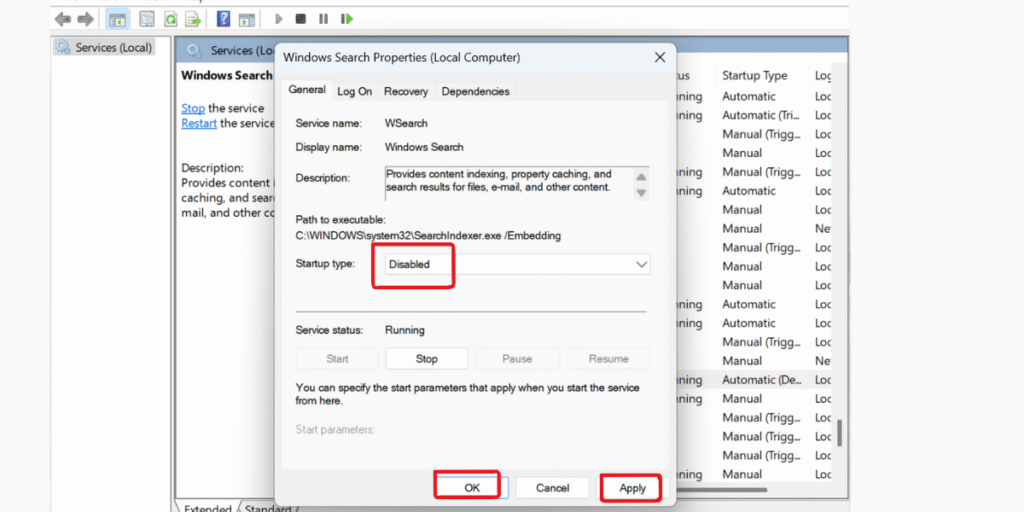
If you want to disable these services, here is how
- Press Win + R, type services.msc, and hit Enter.
- Scroll down to Windows Search.
- Double-click on it.
- Change the Startup type to Disabled.
- Click Stop to end the service immediately.
- Click Apply and then OK.
If You want to re-enable it anytime you can go through previous settings and change the startup type back to Automatic and clicking Start.
Disable Windows Error Reporting
Windows Error Reporting service is an inbuilt feature of Microsoft that looks after your system for crashes, software errors, and other problems. When you are using the computer and something does not work as expected, for example, a program becomes unresponsive, it gathers diagnostic information like memory blocks, logs, error messages, and submits them to Microsoft in order to enhance the dependability of the operating system and other software.
If these kind of issues happen and you do not resolve the problems, or if you wish to avoid sending diagnostic data to Microsoft, this service can be disabled without affecting the day-to-day usage of the computer or the stability of the system.

If you want to disable this service:
- Press Win + R, type services.msc, and hit Enter.
- Find Windows Error Reporting Service in the list.
- Double-click to open it.
- Set Startup type to Disabled.
- Click Stop to terminate it immediately.
- Click Apply, then OK.
This disabling is not recommended for those users who frequently troubleshoot applications or hardware issues, developers, or IT professionals who send error logs for diagnostics to Microsoft to resolve the issues.
Disable SysMain
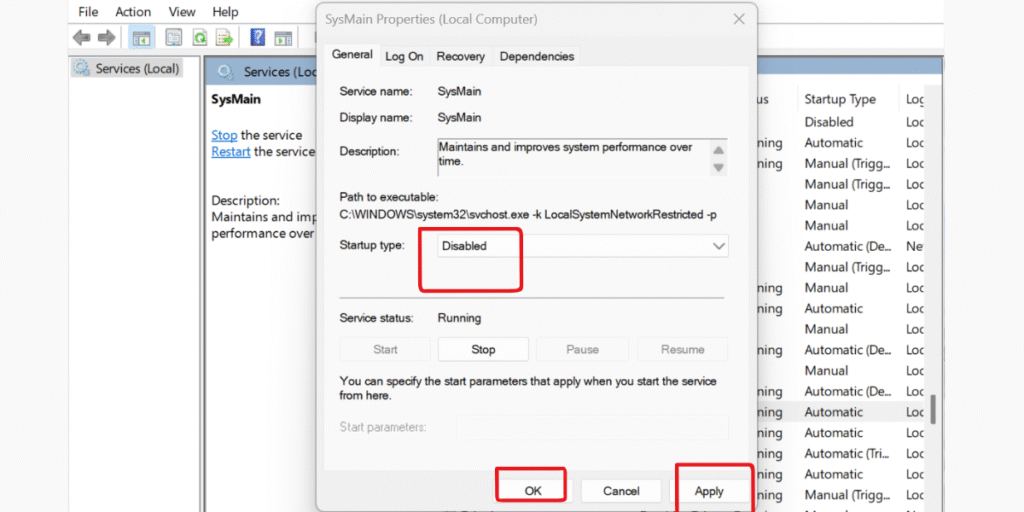
If you want to disable it:
- Press Win + R, type services.msc, and press Enter.
- Scroll to SysMain, right-click, and select Properties.
- Click Stop, then set Startup type to Disabled.
- Click Apply, then OK.
If you disable SysMain, which is safe, it can boost performance on SSDs by reducing disk usage, although it may slow app launches slightly on traditional hard drives.
Disable DiagTrack
If you use an old PC with an HDD and 4 GB of RAM and you frequently use memory intensive applications on your computer, then I completely suggest you to keep SysMain. As you are aware, SysMain is a Windows service that analyzes your usage patterns and keeps commonly accessed apps ready in memory to improve performance, especially on systems with traditional HDDs. But if you use the Windows 11 operating system with a high-speed SSD, then there is no point in keeping this enabled.
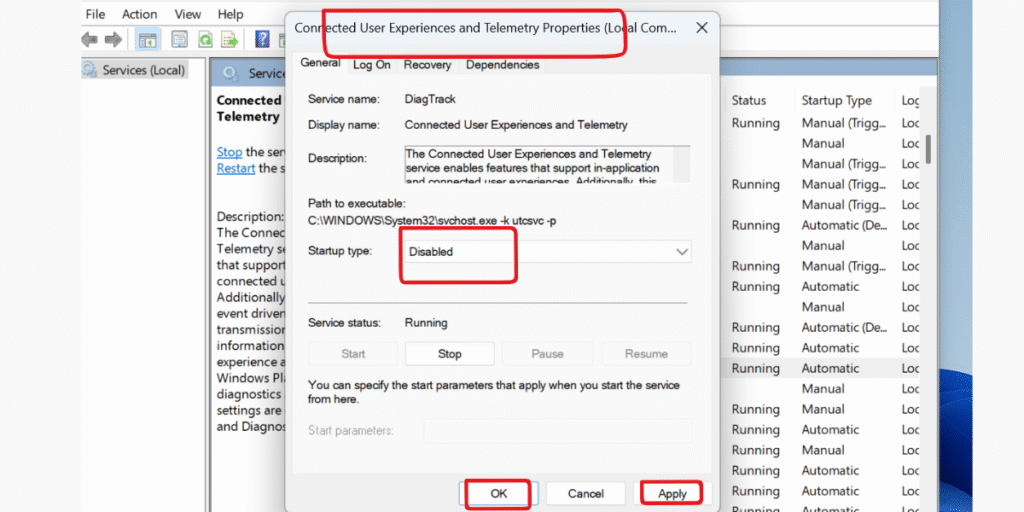
If you want to disable DiagTrack via Services:
- Press Win + R, type services.msc, press Enter.
- Find Connected User Experiences and Telemetry, right-click → Properties.
- Click Stop, then set Startup type to Disabled.
- Click Apply and OK
Latest Post

Windows 11 Embraces Passwordless Login with 1Password Passkey Support
Quick Fix: Administrator Account Has Been Disabled Error in Windows 11
6 Ways to Fix “Windows SmartScreen Can’t Be Reached Right Now” Error on Windows 11
Conclusion:Disable Windows Services in Windows 11
When you follow this guide, you can optimize your Windows 11 PC for better performance especially on older hardware. But here i strongly suggest to proceed carefully, understand what each service does, and back up your system before making changes.
Still confused or stuck about Disable Windows Services in windows 11? Leave your questions in the comments or call me at +1- 844-405-0212. I am here to help!
Stay updated with more at www.365dayson.com !