

Today, phishing attacks are among the most common cybersecurity threats. Cybercriminals attempt to use fake websites, unauthorized apps, or download links to steal users’ personal credentials such as passwords. Fortunately, Microsoft Defender SmartScreen provides Enhanced Phishing Protection, which is a feature built into the Windows 11 version 22H2 for both personal and business users. Enhanced Phishing Protection is designed to safeguard against password theft, prevent unsafe activities, and secure user credentials.
This guide will show how to activate Enhanced Phishing Protection within Windows Security and configure its settings to enhance protection against phishing scams.
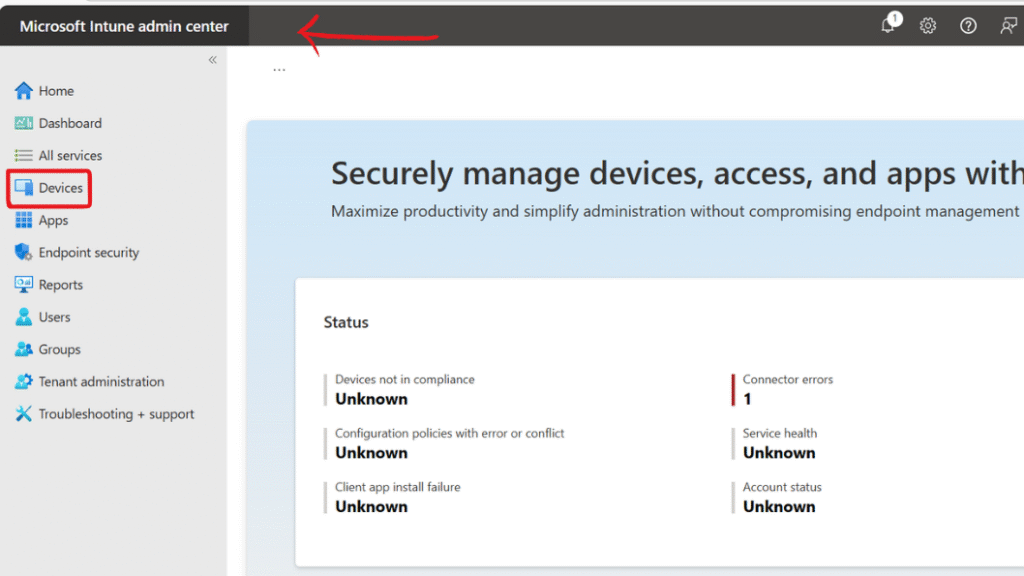
Method 1: Set Up Phishing Protection with Microsoft Intune
Step 2: Click on New Policy, then click Create profile. Choose Windows 10 and Later as the platform and select Settings catalog as the profile type. Proceed to the next step.
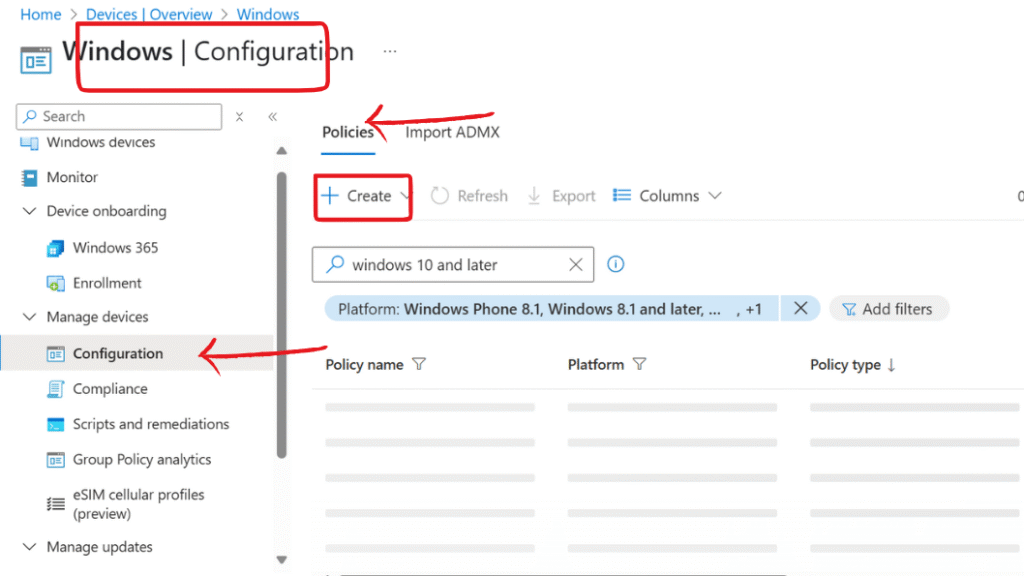
Step 3: Click on New Policy, then click Create profile. Choose Windows 10 and Later as the platform and select Settings catalog as the profile type. Proceed to the next step.
- Notify Malicious: Alert users when they enter their credentials on phishing sites or unauthorized apps.
- Notify Password Reuse: Alerts users about reusing work passwords.
- Notify Unsafe Storage: Prevent storing passwords in plaintext files.
- Notify Unsafe App : warns users if they store their password in Notepad or Microsoft 365.
- Service Enabled: Turns on phishing protection service.
- Automatic data collection :This policy allows Enhanced Phishing Protection to collect additional information such as content displayed, sounds played, and application memory when users enter their work or school password into a suspicious website or app
Method 2: Set Up Phishing Protection via Local Group Policy Editor
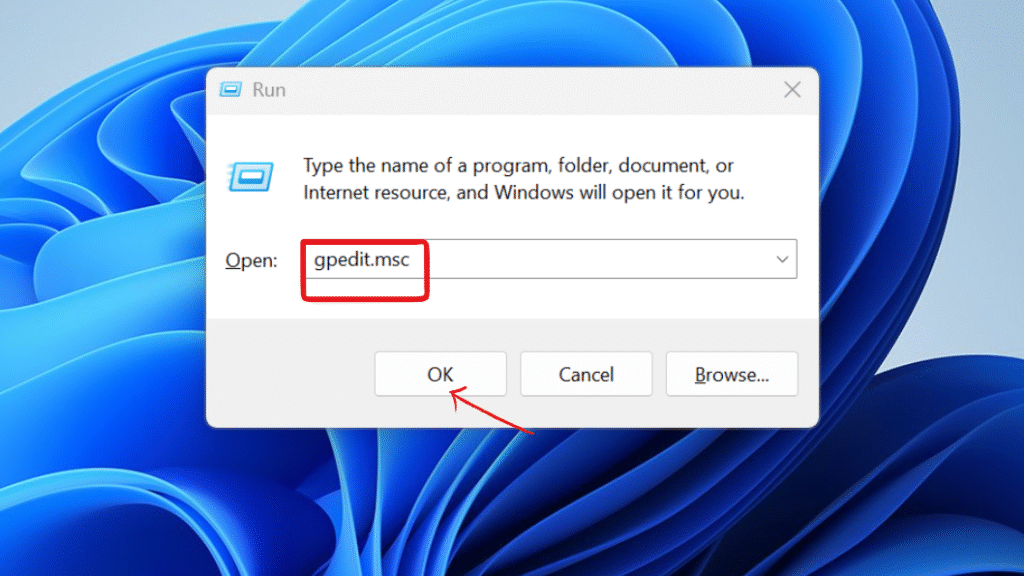
Step 2: Navigate to Computer Configuration > Administrative Templates > Windows Components > Microsoft Defender SmartScreen > Enhanced Phishing Protection.
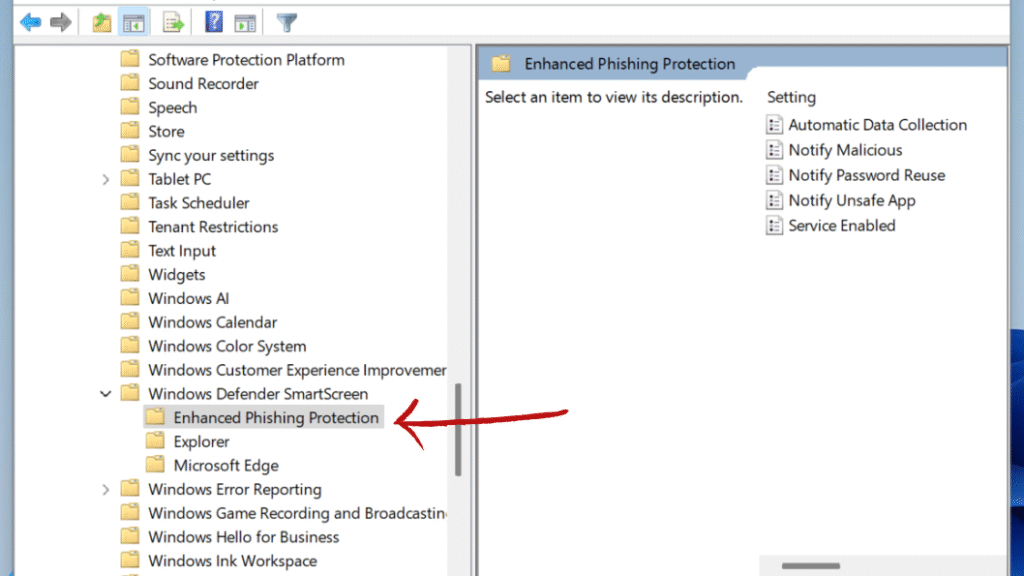
- Service Enabled
- Notify Malicious
- Notify Password Reuse
- Notify Unsafe App
- Automatic Data Collection

Step 4: Click “Apply,” then “OK.” Restart the system for the changes to take effect.
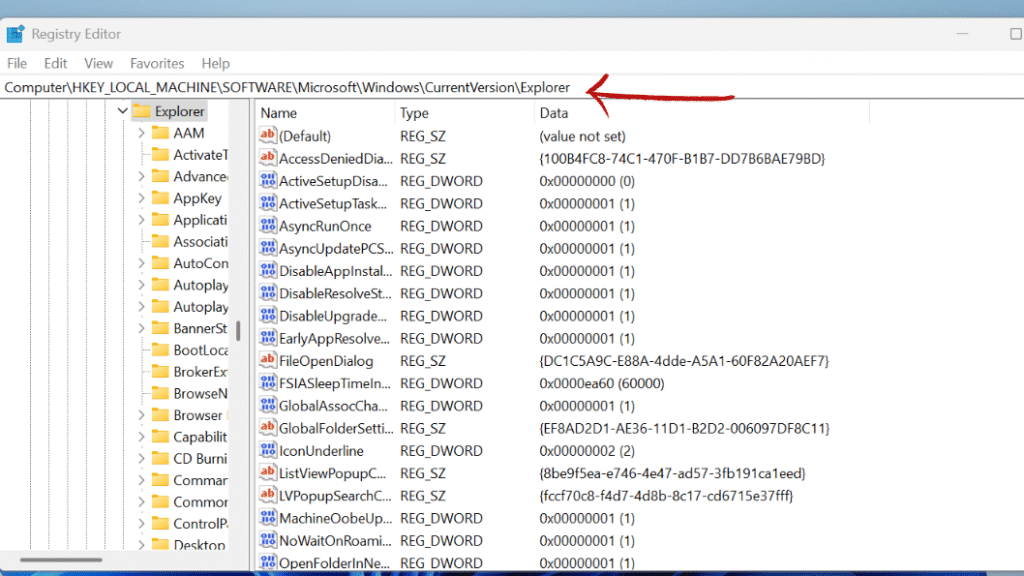
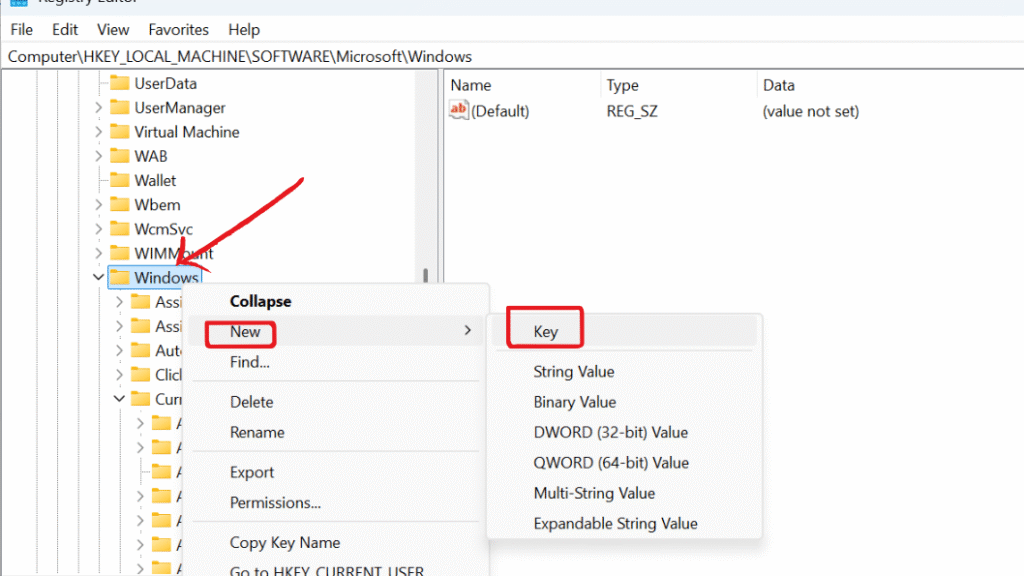
Method 3: Set Up Phishing Protection Via Registry Editor ( For Advanced user only)

- Service Enabled
- Notify Malicious
- Notify Password Reuse
- Notify Unsafe App
- Automatic Data Collection
Step 4: Modify the following DWORD (32-bit) values, setting each to 1 to enable, 2 to block, or 0 to disable
- EnableSmartScreen → Set to 1 (Enables SmartScreen).
- NotifyMalicious → Set to 1 (Warns users about phishing sites).
- NotifyPasswordReuse → Set to 1 (Alerts users about password reuse).
- NotifyUnsafeStorage → Set to 1 (Prevents storing passwords in plaintext files).
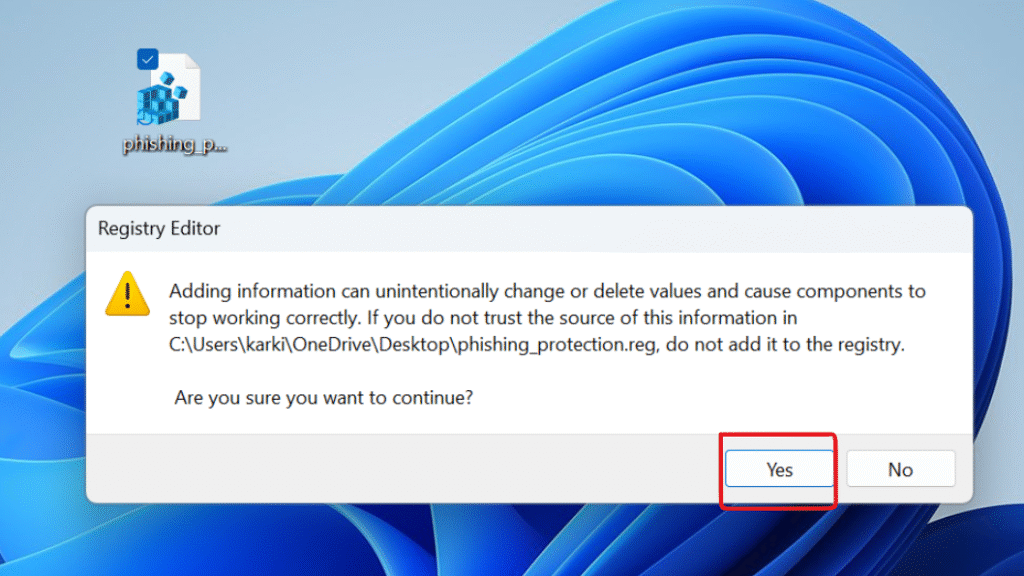
Step 5: Close the Registry Editor and restart your computer for the changes to take effect.
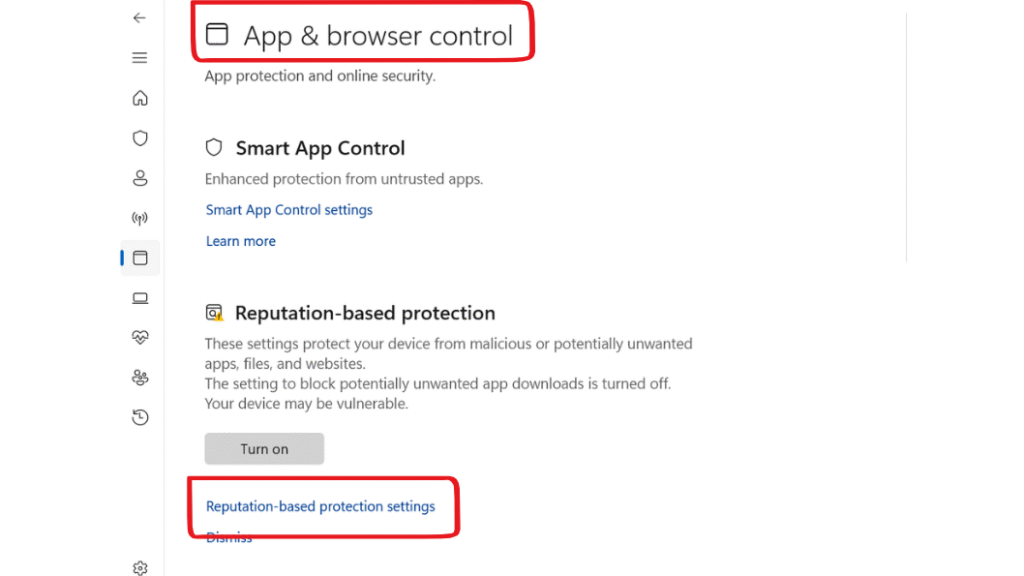
Method 4: Configure Phishing Protection via Windows Security

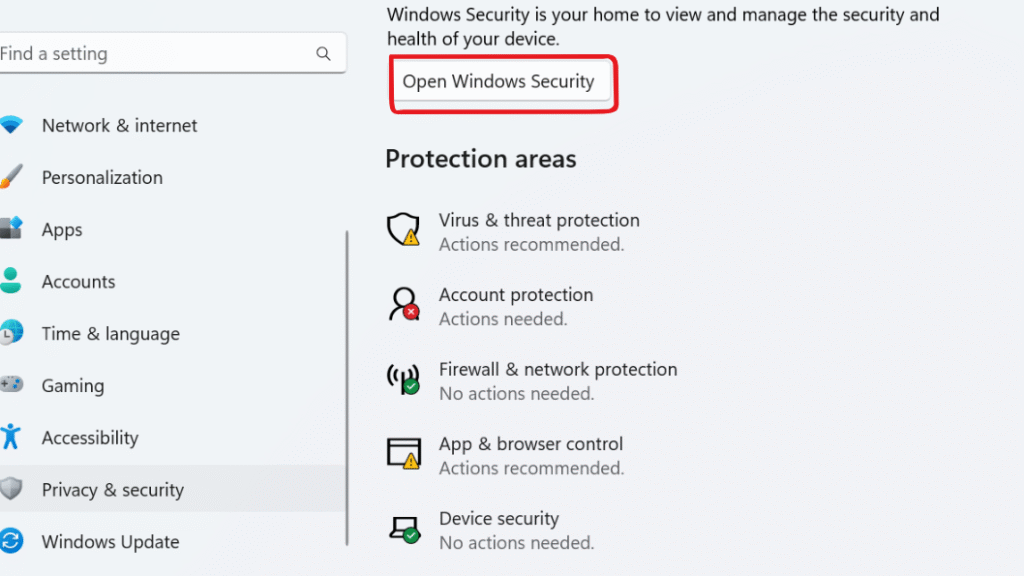
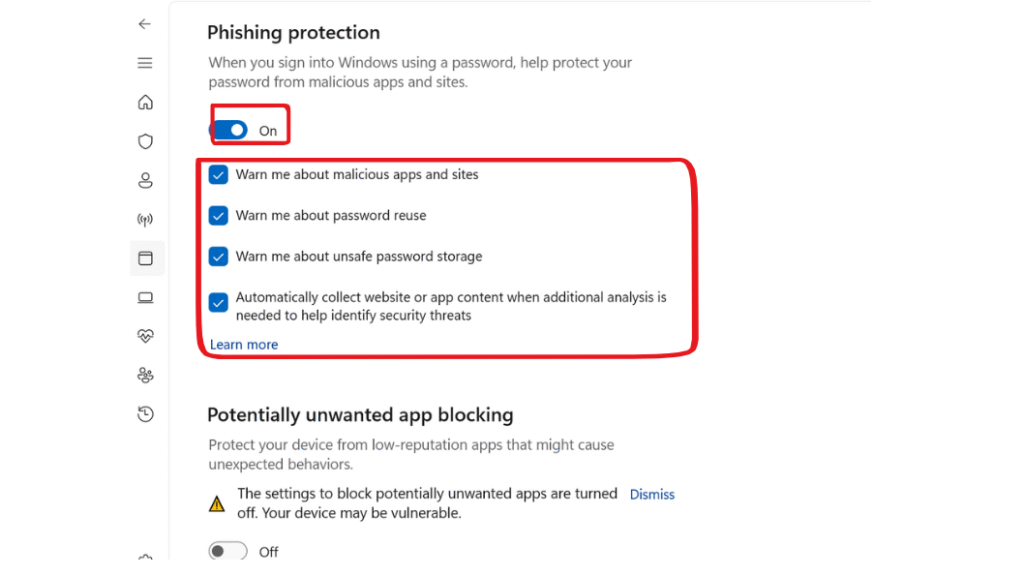
Step 4: Scroll down to Phishing protection and Toggle on the Phishing protection switch.
Make sure the following options are enabled for full protection:
✅ Warn me about malicious apps and sites
✅ Warn me about password reuse
✅ Warn me about unsafe password storage
Method 5: Configure Phishing Protection Via .reg File
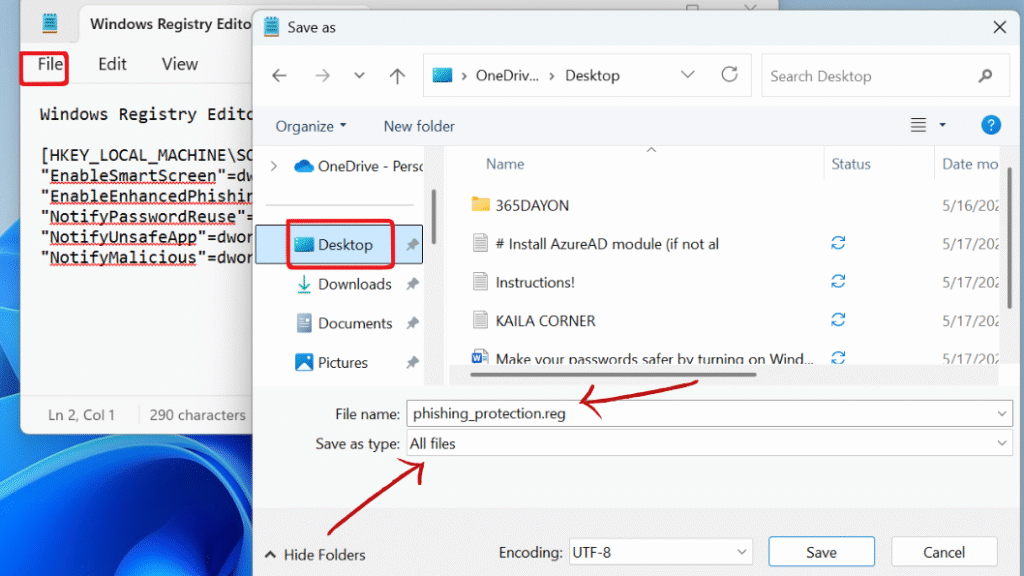
Step 1:Open Notepad and Copy and paste the following content:
Windows Registry Editor Version 5.00
[HKEY_LOCAL_MACHINE\SOFTWARE\Policies\Microsoft\Windows\System]
“EnableSmartScreen”=dword:00000001
“EnableEnhancedPhishingProtection”=dword:00000001
“NotifyPasswordReuse”=dword:00000002
“NotifyUnsafeApp”=dword:00000001
“NotifyMalicious”=dword:00000001

Step 2: Save it as phishing_protection.reg (make sure to select All Files as the file type).

Final Thought : Set Up Phishing Protection in Microsoft Security
Phishing protection is a powerful security and often overlooked feature that comes free with Windows 11. It integrates into Windows Security and powered by Microsoft Defender SmartScreen that offers real time protection against phishing websites, malicious apps, and unsafe password use without the need for third party applications.
If you enable few settings, you can automatically reduce your risk of falling victim to online scams, password theft, and identity fraud. This tool can be beneficial Whether you’re a beginner or a tech-savvy user .So turn on Windows phishing protection today and stay a step ahead of cyber threats.
Still confused or stuck about How to How to configure phishing protection on windows 11. Leave your questions in the comments or call me at +1– 844-405-0212. I am here to help!
Stay updated with more at www.365dayson.com !