Quick Fix: Administrator Account Has Been Disabled Error in Windows 11

Are you getting an error ‘The Administrator Account Has Been Disabled’ when you are trying to log into your Windows 11 device?

This issue can prevent you from logging into your system and stop you from making any changes. This kind of issue normally happens because of a system update, misconfiguration, group policy settings, or accidental user management, and do not worry; this problem is fixable.

In this guide, I’ll explain how to resolve the issue ‘The Administrator Account Has Been Disabled’ through several proven methods to reactivate the built-in administrator account and regain access to your Windows 11 device.

Method 1: Enable Administrator via Safe Mode with Command Prompt

You can enable the administrator account via Safe Mode with Command Prompt, which can help you regain access. This is the most effective solution when you’re locked out of your primary (administrator) account, and you can fix your system by following a few steps.
Step 1: Press and hold the Shift key, then click Restart from the Power options on the login screen to access advanced startup options.
Step 2: When your PC restarts, navigate to: Troubleshoot → Advanced options → Startup Settings → Restart, then after the next reboot, press the number key (usually 4 or 6) to select Enable Safe Mode with Command Prompt. Wait for Windows to load into Safe Mode, where you’ll be taken directly to a Command Prompt window.

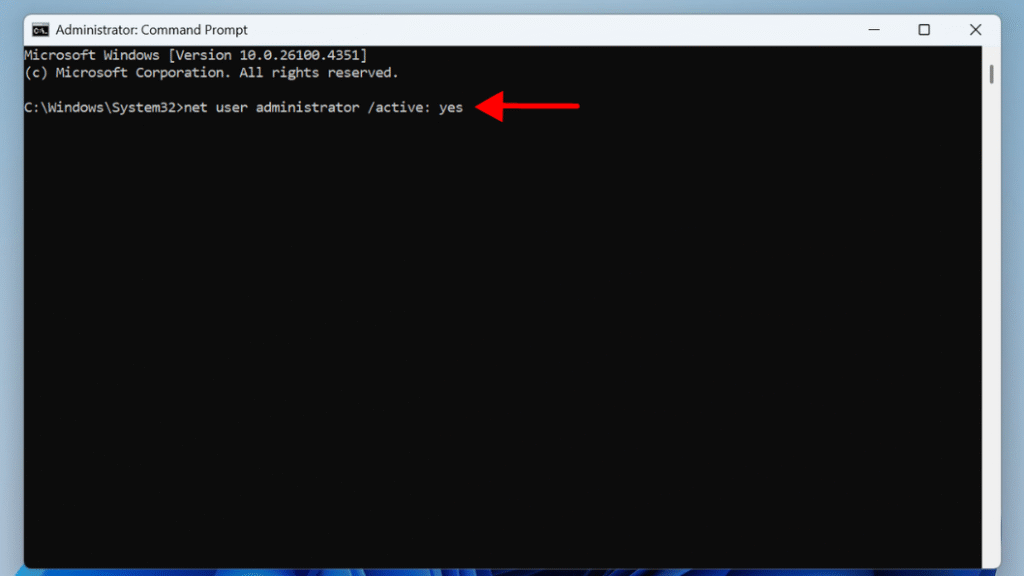
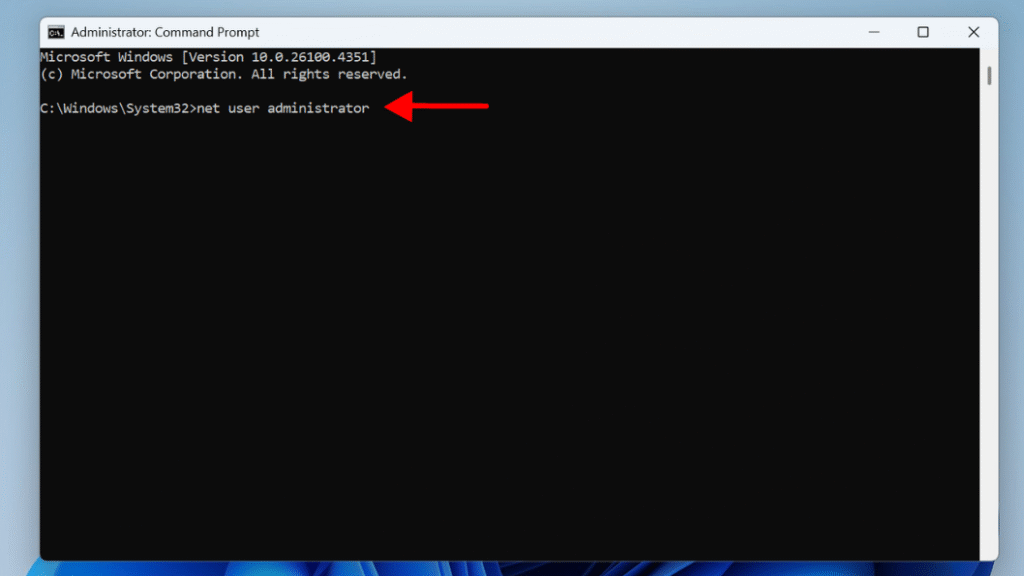
Step 3: To activate the hidden Administrator account, open Command Prompt and enter net user administrator /active: yes, then press Enter. And you’ll see the message: ‘The command completed successfully.’

windows 11
Step 4: To set a password for the Administrator account (which is optional but recommended), type net user administrator in the Command Prompt and press Enter—you’ll then be asked to type and confirm a new password..’
administrator account has been disabled
Step 5: Close the Command Prompt, restart your PC normally, and you should now see the Administrator account available on the login screen.

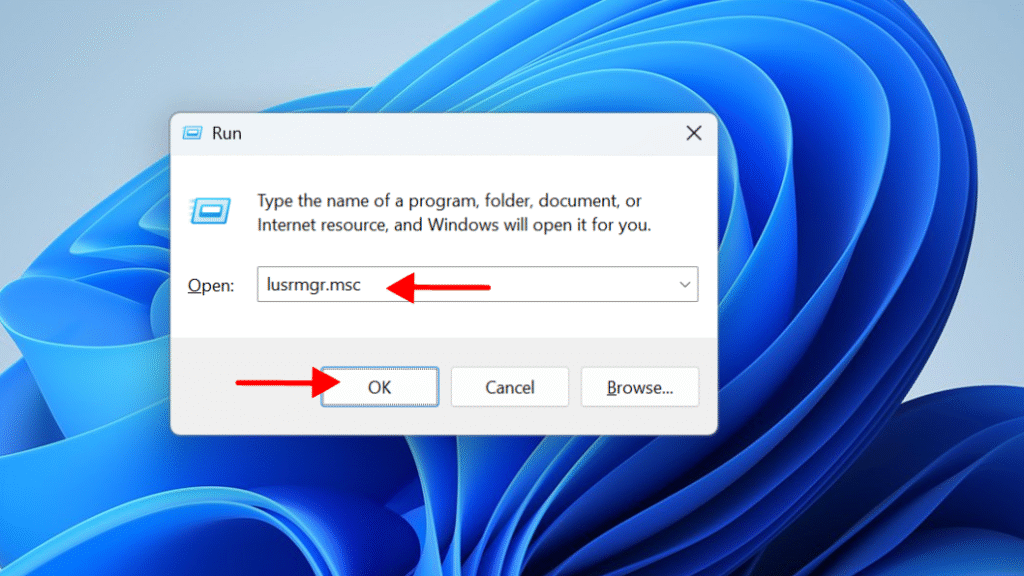
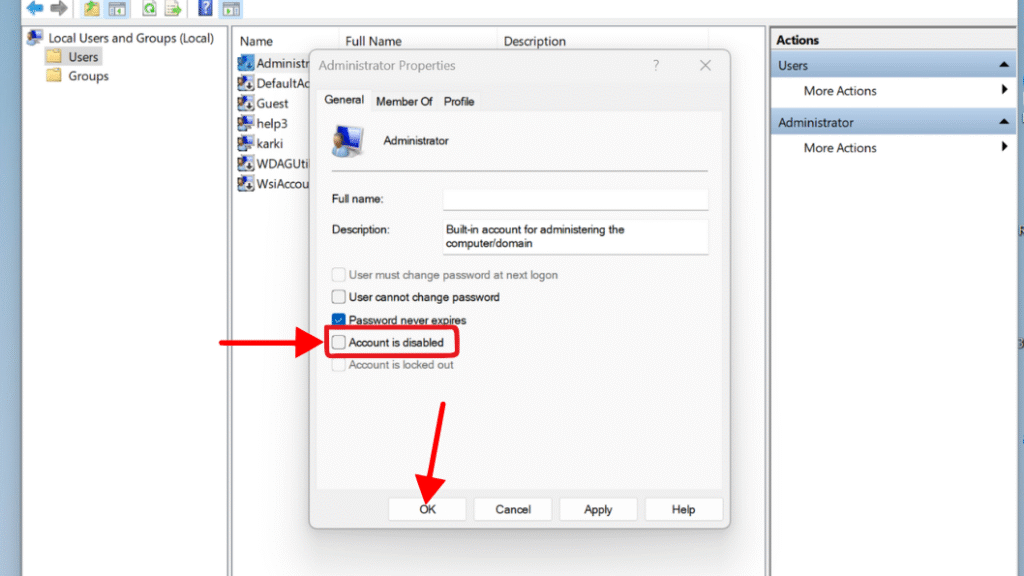
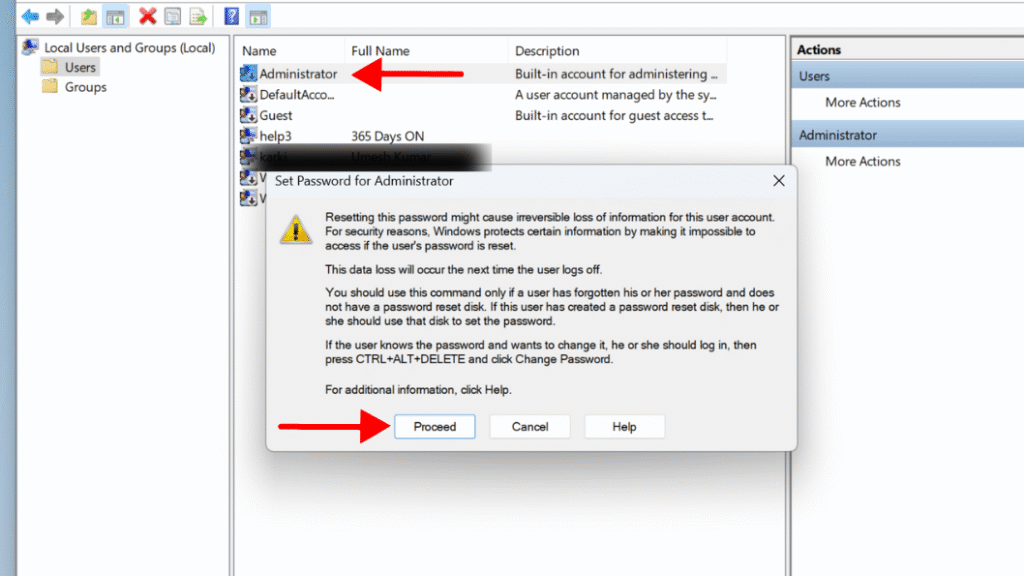
Method 2: Use Local User and Group Management (If Accessible)

If you can sign in with another admin account, you can open Local Users and Groups to enable the built-in Administrator account or manage user accounts. you can use this method on Windows 10/11 Pro, Enterprise, and Education editions but this service is not available on home editions.
Step 1: Press Windows + R to open the Run dialog box, then type lusrmgr.msc and press Enter.
Step 2: To enable the built-in Administrator account, open Users in the left panel, double-click the Administrator account in the right panel, uncheck Account is disabled, and then click OK.
Step 3: Right-click the Administrator account, select Set Password, click Proceed, and then enter a new password.
Step 4: Log out of your current account and switch to the Administrator account if you need to.

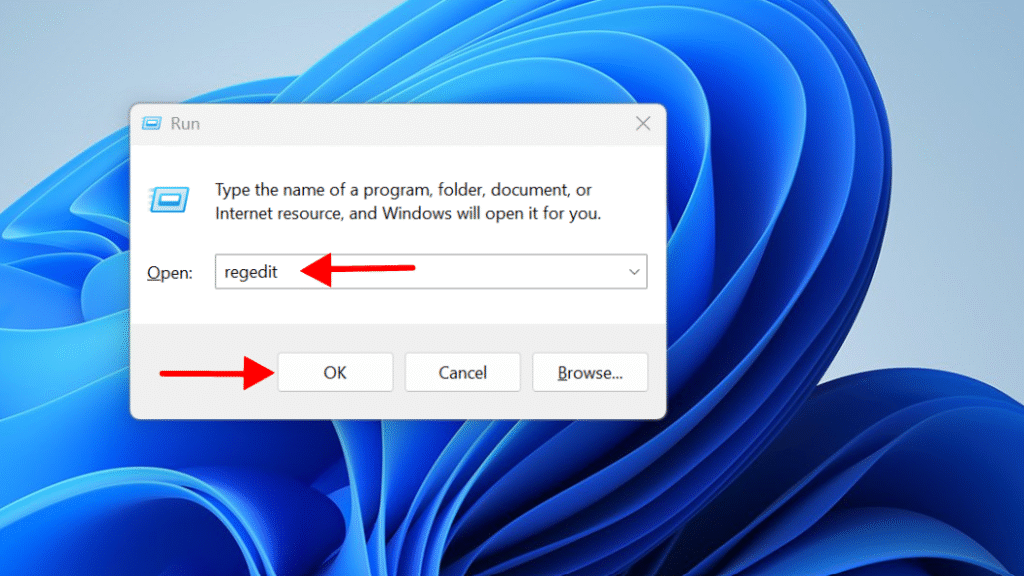
Method 3: Enable Administrator via Registry Editor

You can enable the built-in Administrator account using the Registry Editor but be cautious—making wrong changes can lead to system problems, so use this method only if other options aren’t working.
Step 1: Sign in to any account that has administrator privileges.
Step 2: Press Windows + R, type regedit in the Run box, then press Enter and allow any prompts that appear to open the Registry Editor.

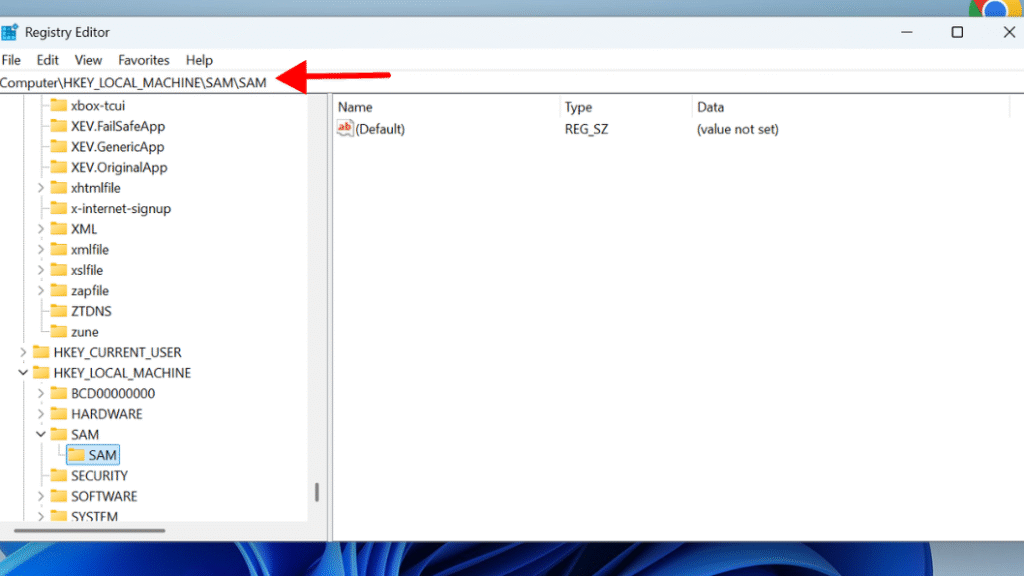
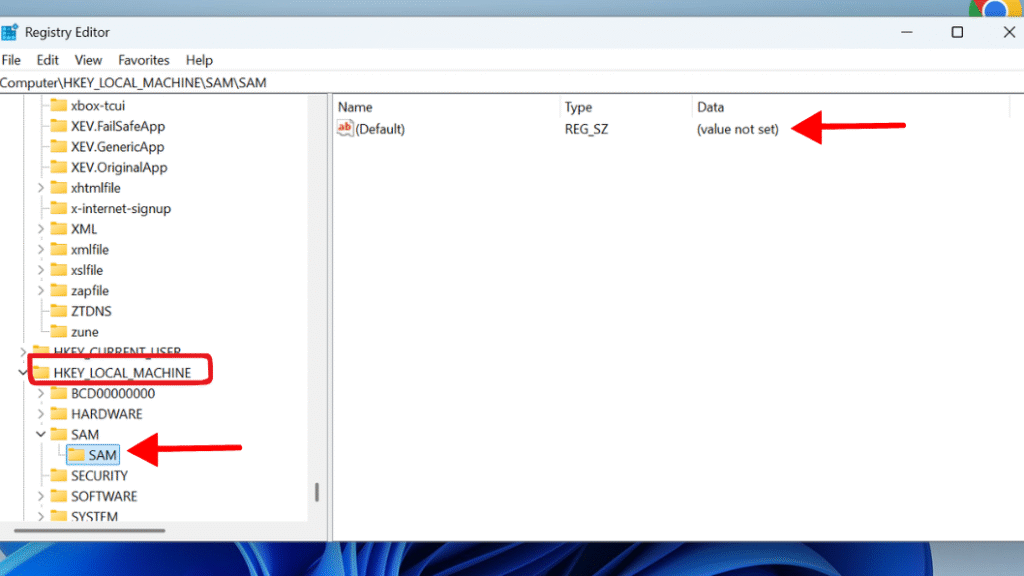
Step 3: Navigate to: HKEY_LOCAL_MACHINE\SAM\SAM

Step 4: In the Registry Editor, expand HKEY_LOCAL_MACHINE, open SAM, and then select the second SAM subkey.
Step 5: If the SAM key isn’t accessible, you may need to load the hive manually: In Registry Editor, right-click HKEY_LOCAL_MACHINE and select Load Hive. Browse to C:\Windows\System32\config\SAM and open the file. When prompted, name the new hive MySAM.

Step 6: Navigate to: HKEY_LOCAL_MACHINE\MySAM\SAM\Domains\Account\Users\000001F4
This key represents the built-in Administrator account.

Step 7: Double-click the F binary value, locate the line starting with 0038, and change the 11th byte from 10 to 11—this enables the Administrator account.
Step 8: After making the change, click OK, close the Registry Editor, and restart your PC.

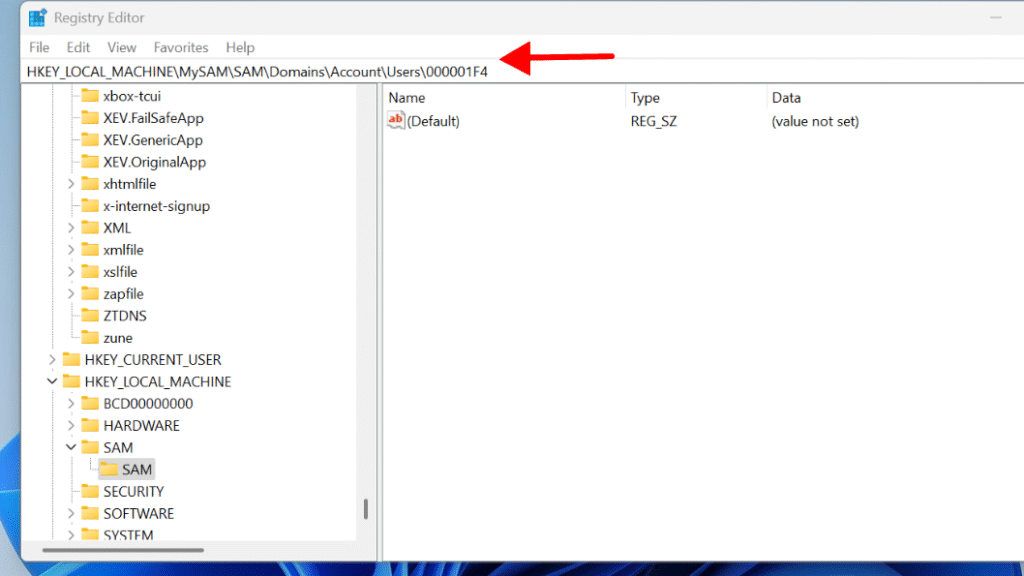
⚠️ Be Cautious – incorrect registry edits can make your system unbootable, so only proceed if you’re confident or have created backups.

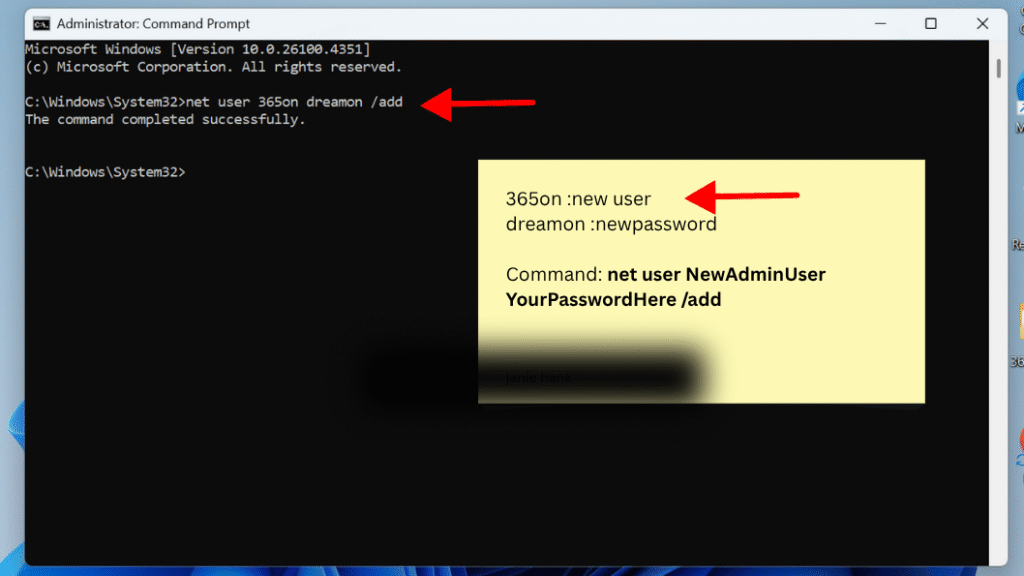
Method 4: Create a New Administrator Account via Command Prompt

You can create a new administrator account via Command Prompt which is a powerful method and especially useful when you’re locked out of an existing admin account .But You should have access to CMD through Safe Mode or recovery tools to run this method.
Step 1: From a working admin session, Safe Mode, or Recovery, open Command Prompt as an administrator.

Step 2: To create a new user, use the command net user NewAdmin /add and YourPasswordHere /add, replacing NewAdminUser with your preferred username and YourPasswordHere with a strong password.

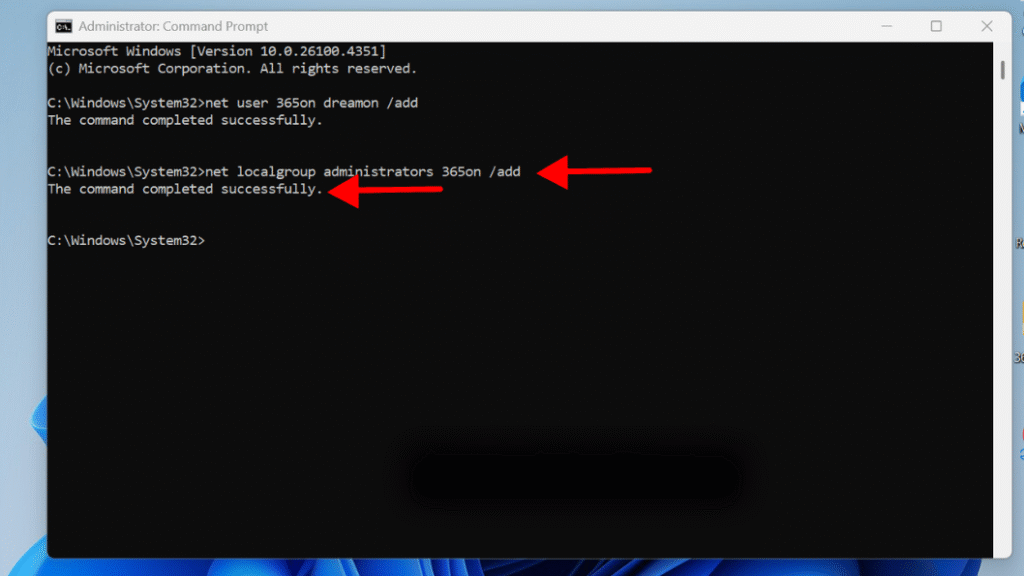
Step 3: Add the new user to the Administrators group by running:

net localgroup administrators NewAdminUser /add

Step 4: Restart and log in with your new admin account.

Final Thought

Getting locked out due to “The Administrator Account Has Been Disabled” may seem like a serious issue, yet it can be resolved with a few simple steps. You can regain access to your Windows 11 PC using Safe Mode or the Registry Editor; it’s just a matter of which method you prefer to use. I request that you have a backup of your system if you perform the Registry Editor method because an incorrect edit can cause system problems.

Still confused or stuck with the Administrator Account Has Been Disabled Error in Windows 11 ?

Drop your questions in the comments or visit www.365dayson.com for more help!

Leave a Comment