
Safe Mode is a powerful diagnostic tool that Microsoft provides on Windows 11 . It starts your system with only the essential drivers and services which help you diagnose and fix various issues. Adding Safe Mode to your Windows 11 boot menu creates a permanent troubleshooting option for startup issues.
In this guide, you’ll learn how to add Safe Mode to Boot Menu, Safe Mode with Networking, and Safe Mode with Command Prompt in Windows 11. This method takes your system directly into Safe Mode -no need to enter recovery or use keyboard shortcuts during startup.
Add Safe Mode to the Boot Menu via Command Prompt

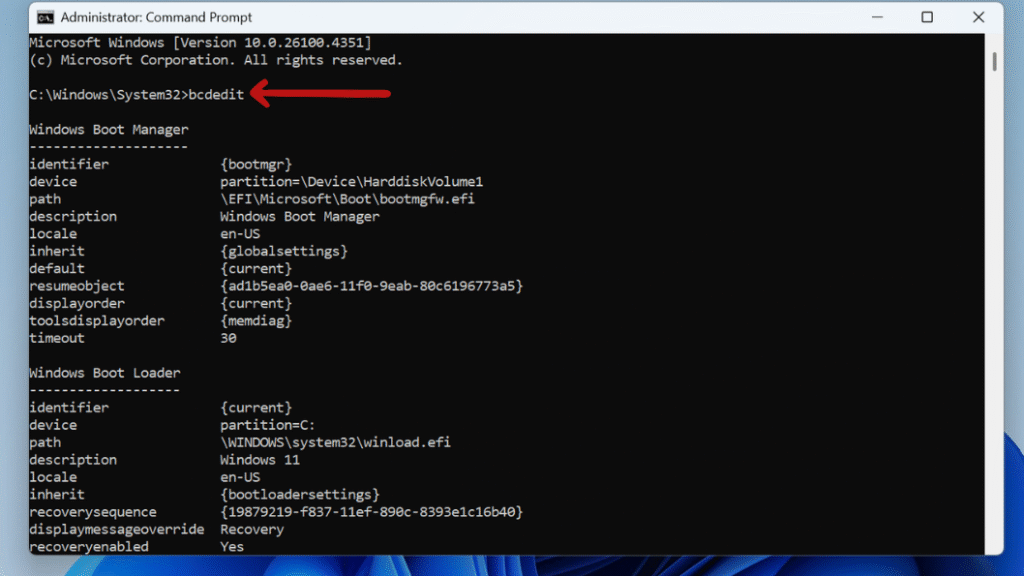
bcdedit
Step 3: To create a copy of your boot entry for Safe Mode, replace {identifier} with the actual identifier you noted earlier, and assign a clear description.
For standard Safe Mode, run:
bcdedit /copy {identifier} /d “Windows 11 Safe Mode”
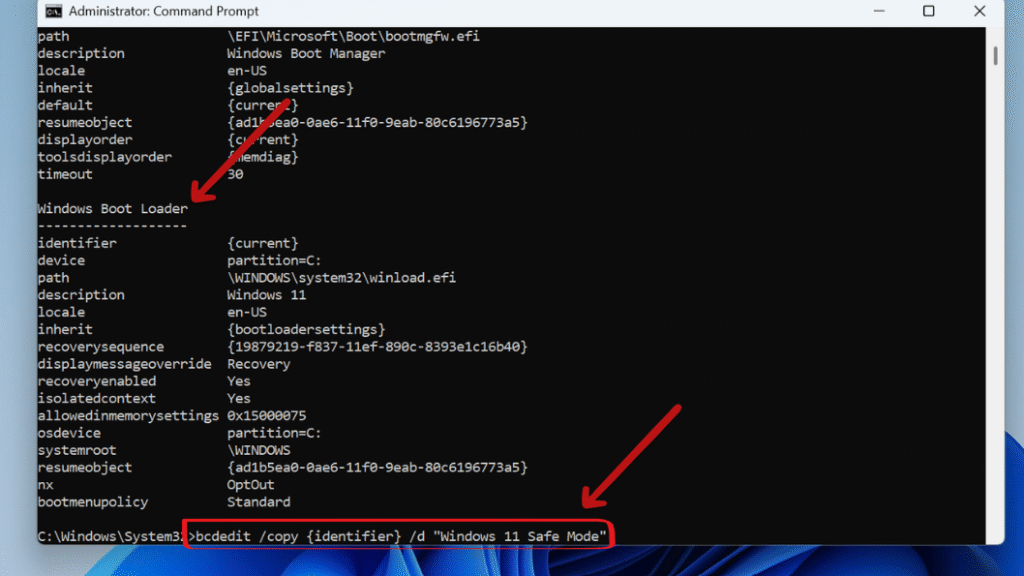
This command creates a duplicate of your current boot entry and labels it “Windows 11 Safe Mode”.
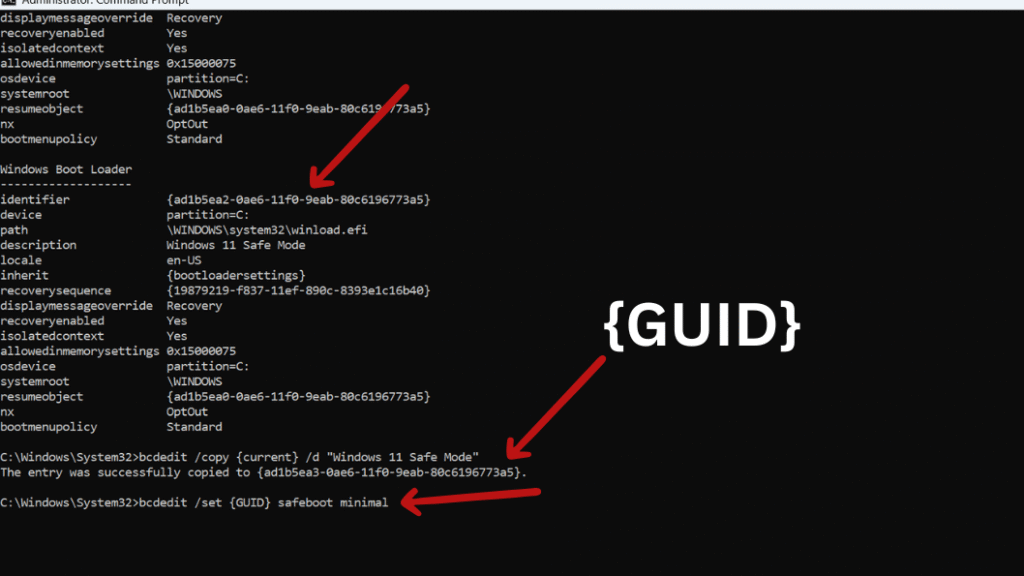
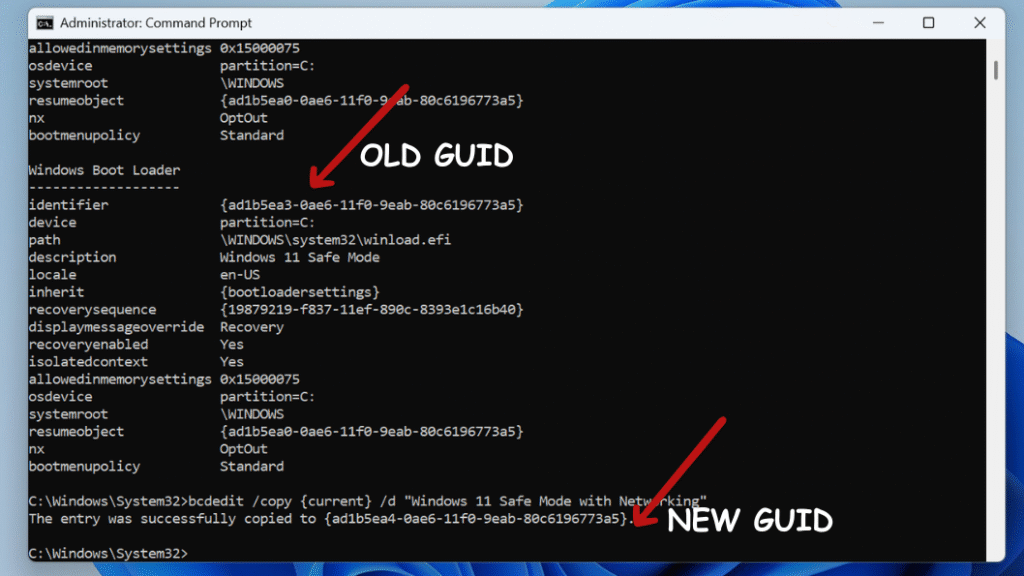
After executing it, you’ll get a GUID (e.g., {xxxxxxxx-xxxx-xxxx-xxxx-xxxxxxxxxxxx}); make sure to copy this ID for use in the next steps.
bcdedit /set {GUID} safeboot minimal
Add a boot entry for Safe Mode with Networking
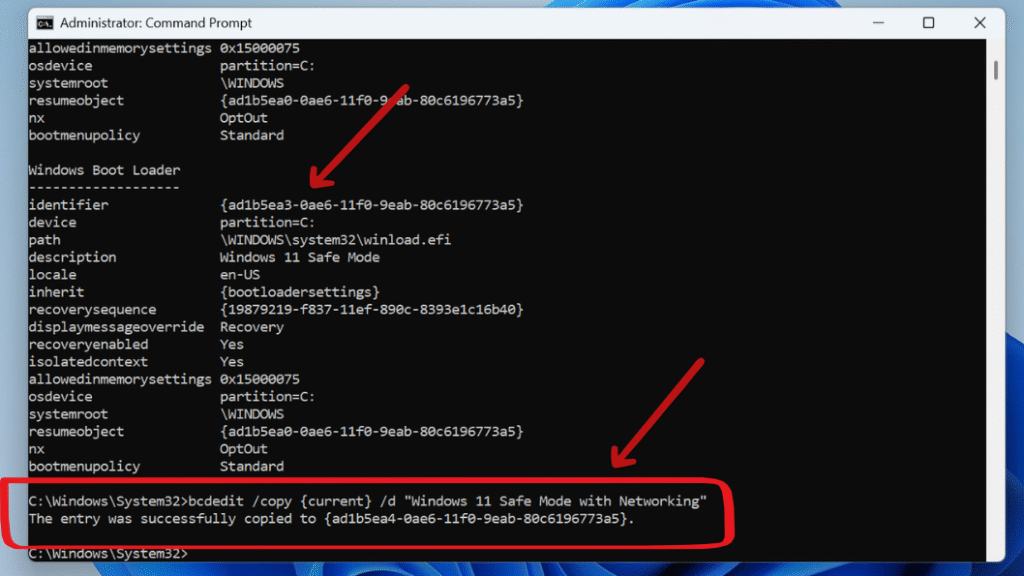
bcdedit /copy {current} /d “Windows 11 Safe Mode with Networking”
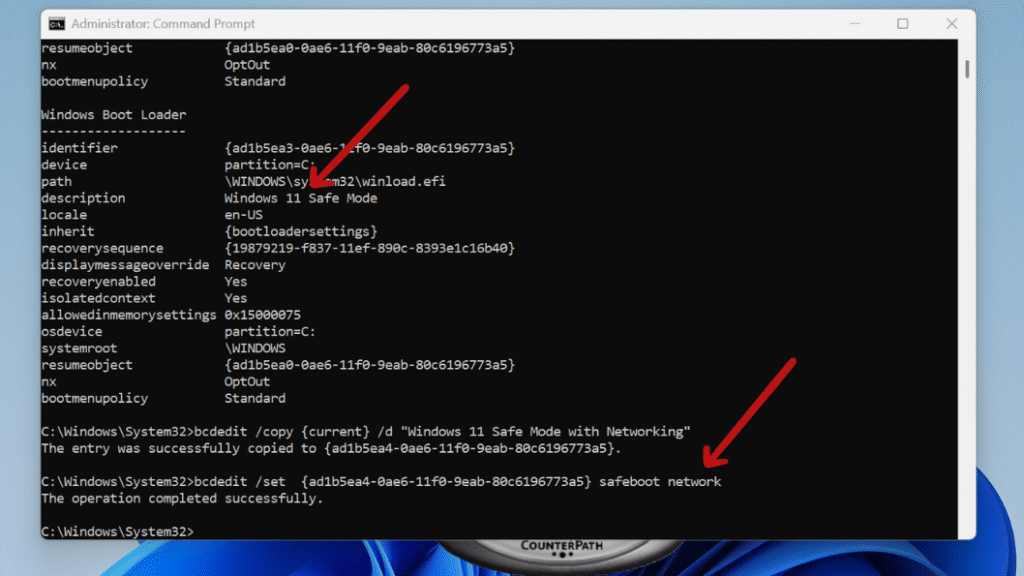
Step 3: Then run this command, replacing {GUID} with that new ID:
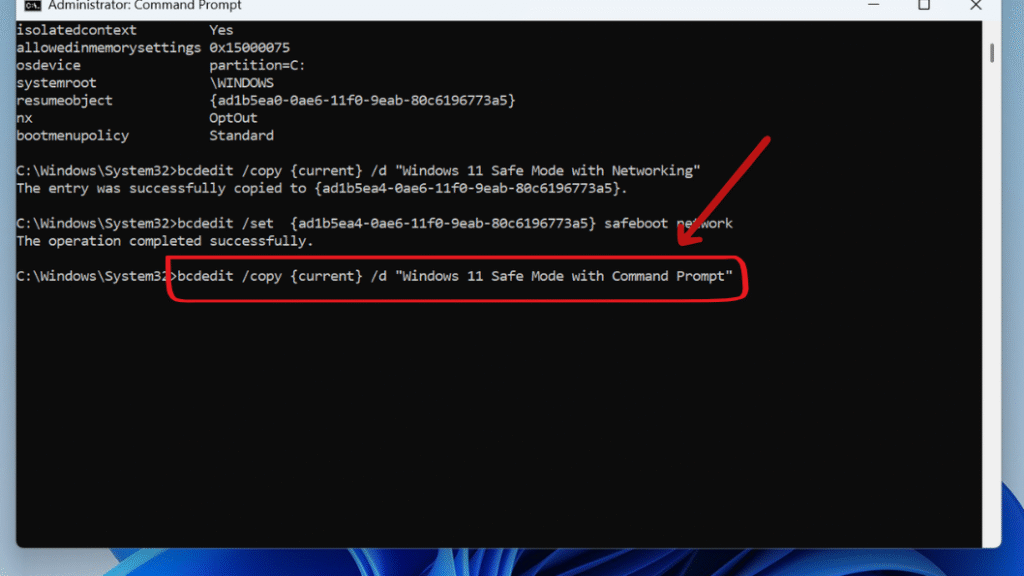
Add a boot entry for Safe Mode with Command Prompt
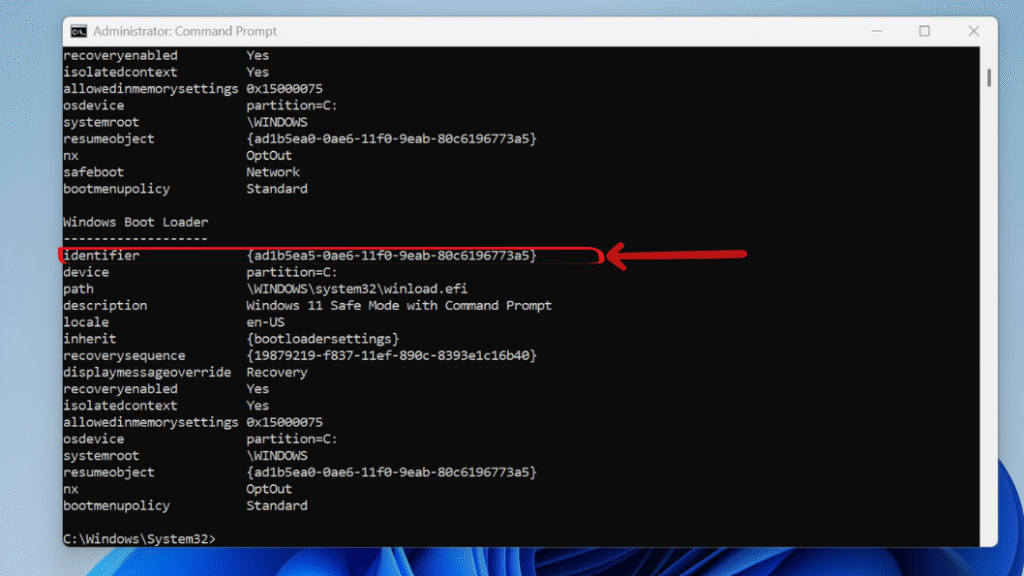
bcdedit /copy {current} /d “Windows 11 Safe Mode with Command Prompt”
bcdedit /set {GUID} safeboot minimal
bcdedit /set {GUID} safebootalternateshell yes
Set Timeout for Boot Menu
Step 1: Run bcdedit /timeout 15
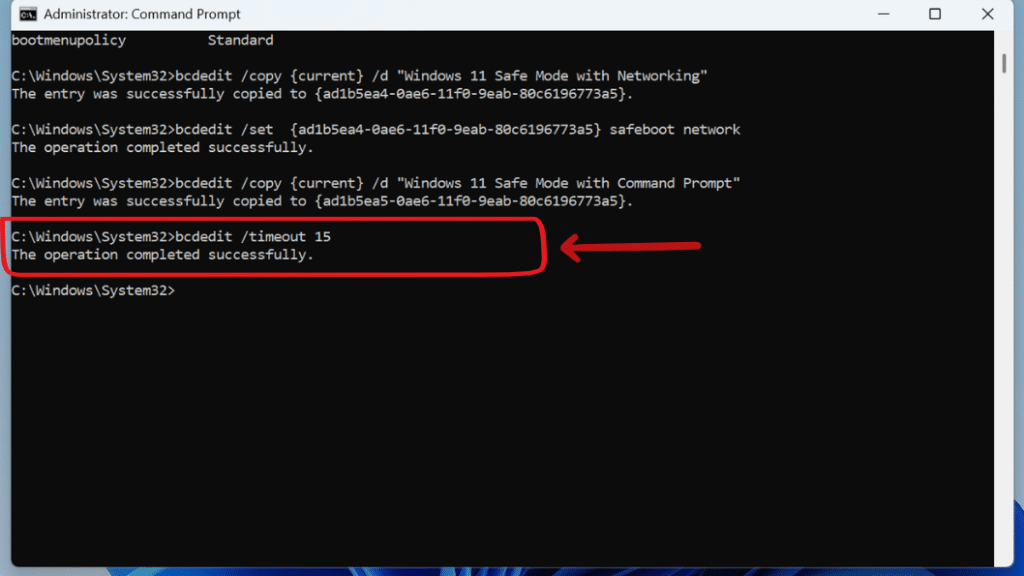
bcdedit manages boot configuration data, and /timeout 15 sets the boot menu to display for 15 seconds before automatically selecting the default entry.
Want to Remove Safe Mode from the Boot Menu
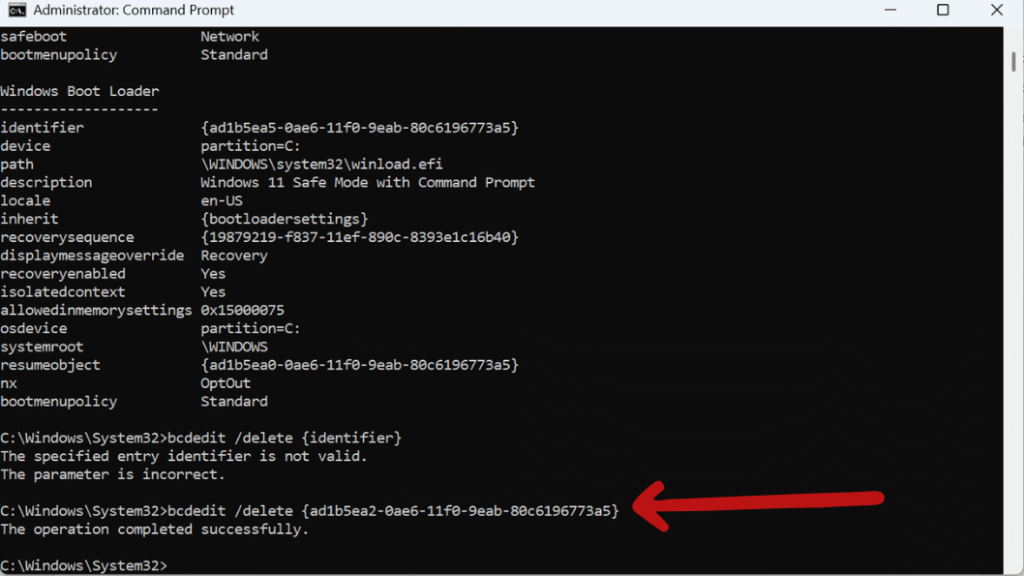
Step 2: Run bcdedit This will list all boot entries. Copy the identifier (GUID) for the one you want to remove, then run You’ll see a line above it that looks like:
Identifier: {ad1b5ea2-0ae6-11f0-9eab-80c6196773a5 }
Step 3: Copy the {identifier} associated with the Safe Mode entry you want to delete.
Run the Following command to delete Safe mode entry:
bcdedit /delete {identifier}
Final Thought: How to Add Safe Mode to Boot Menu Options in Windows 11
Adding Safe Mode to the Windows 11 boot menu is a great move if you frequently troubleshoot system issues or want a quick recovery option. A few commands are all that’s needed to automate some of the necessary steps, and you will always have access to essential recovery tools—no matter how badly Windows is misbehaving during startup.
Stay updated with more at www.365dayson.com !