This method allows to customize the appearance of the Recycle Bin icon (both full and empty) using Windows’ built-in Desktop Icon Settings. It’s a simple way to personalize your desktop.
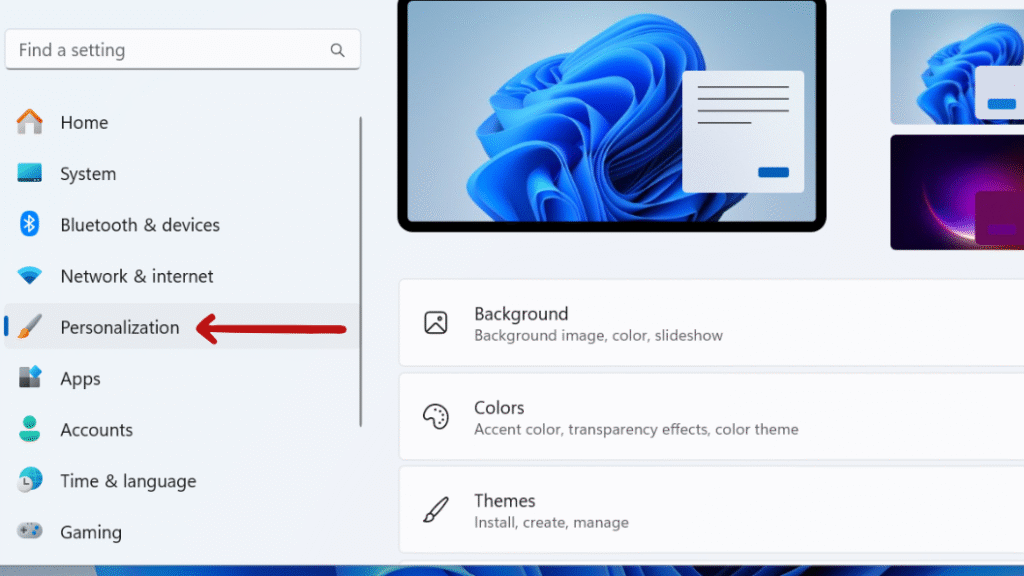
Step 2: In the Settings window, click on Personalization in the left-hand menu—this section controls visual elements such as background, colors, and themes.
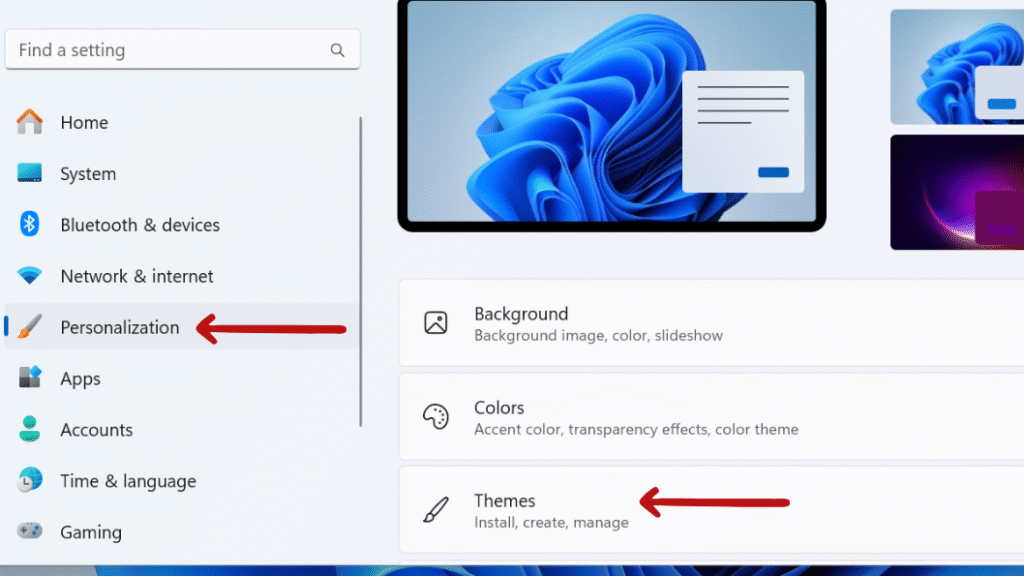
Step 3: In Personalization, select Themes as this section handles theme-related settings and desktop icon customization.
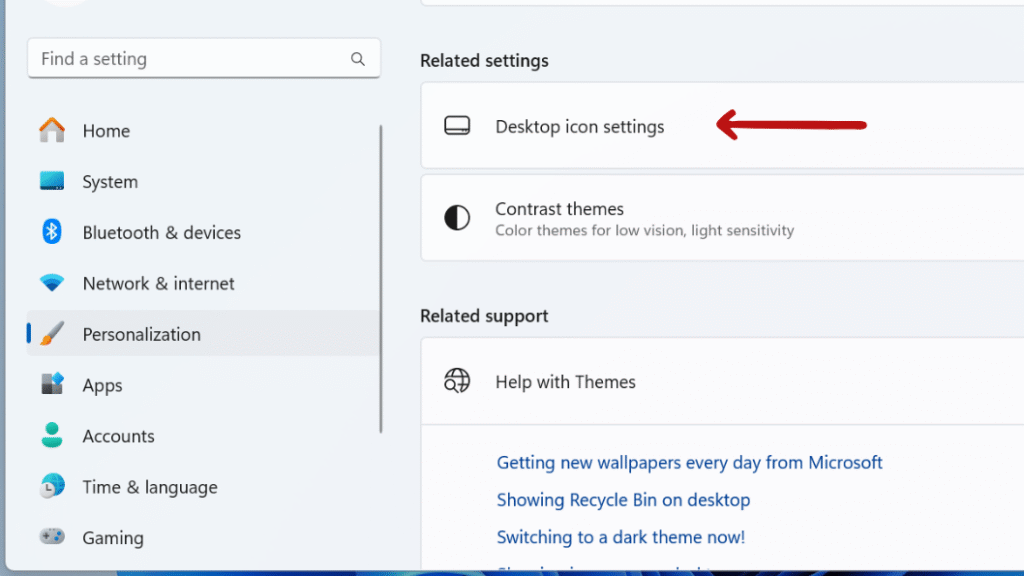
Step 4: Scroll down to the Related settings section and click on Desktop icon settings.
Tip: You can also quickly find it by searching “Desktop icon settings” in the Start Menu.
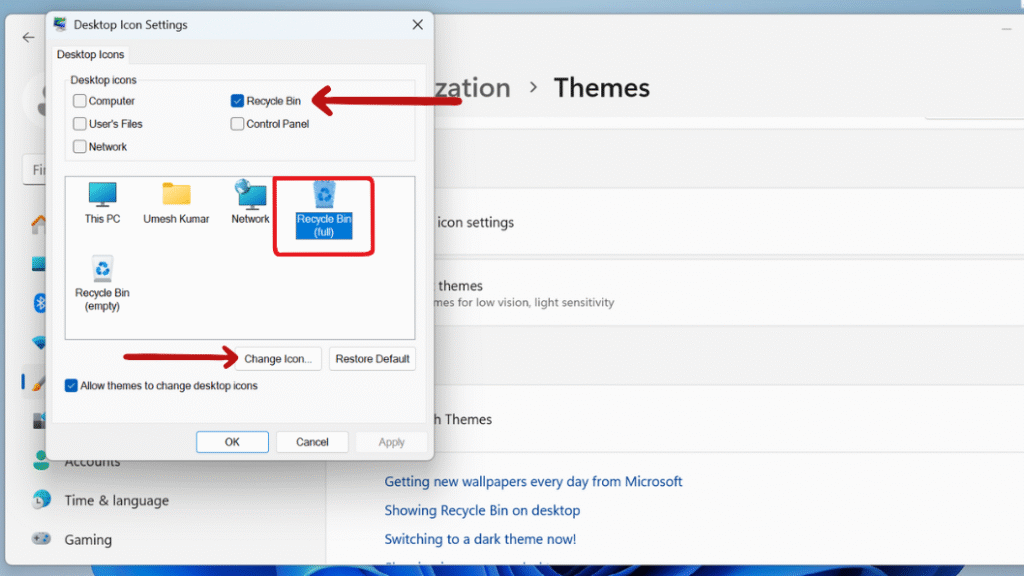
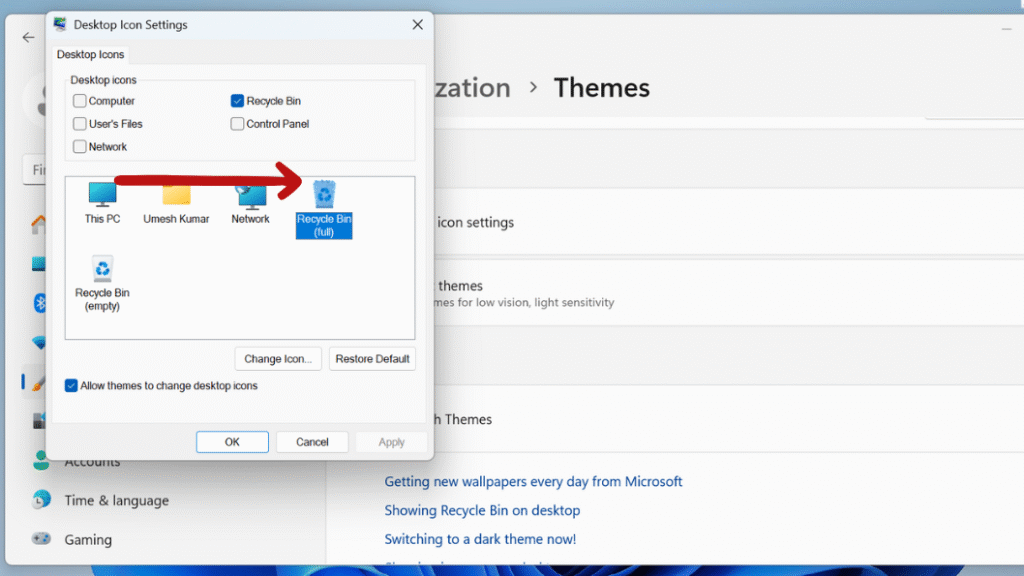
Step 5: In the Desktop Icon Settings window, select either Recycle Bin (Full) or Recycle Bin (Empty) based on the state you want to change, then click Change Icon.
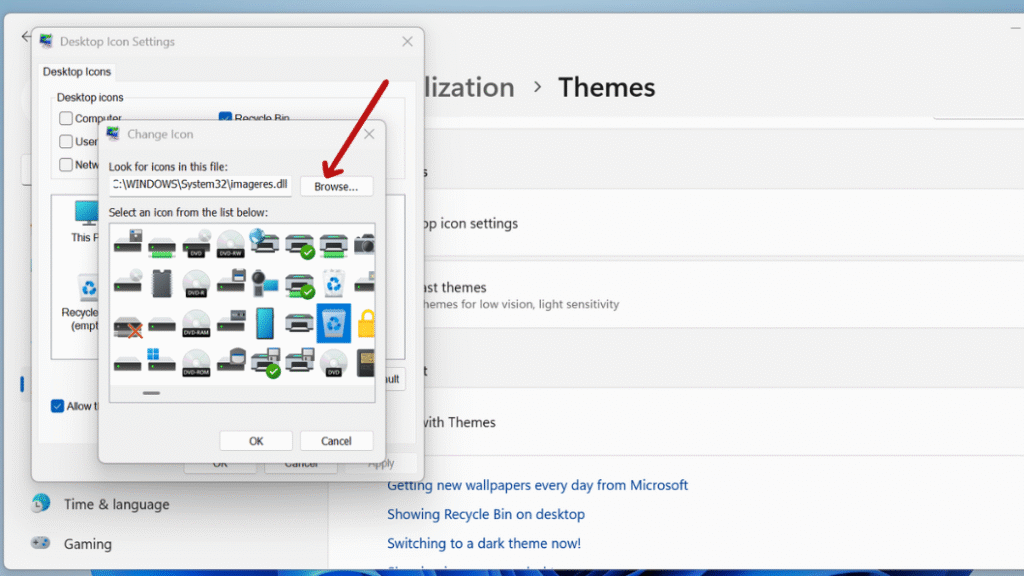
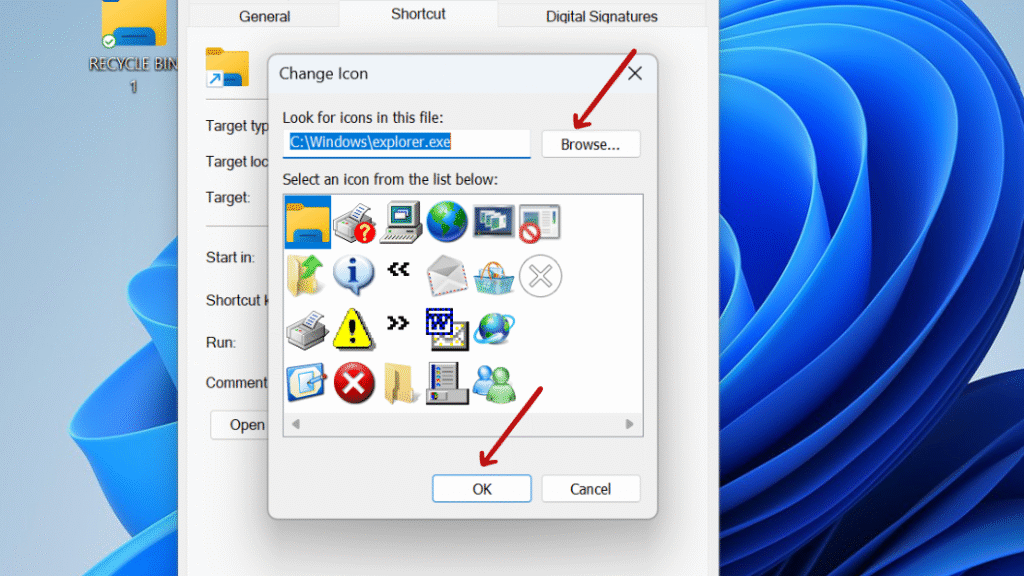
Step 6: A list of built-in icons will appear—select one or click Browse to find a custom .ico file on your PC.
Step 7: Click Apply, then OK, and your desktop icons will immediately update to show the new Recycle Bin icons.
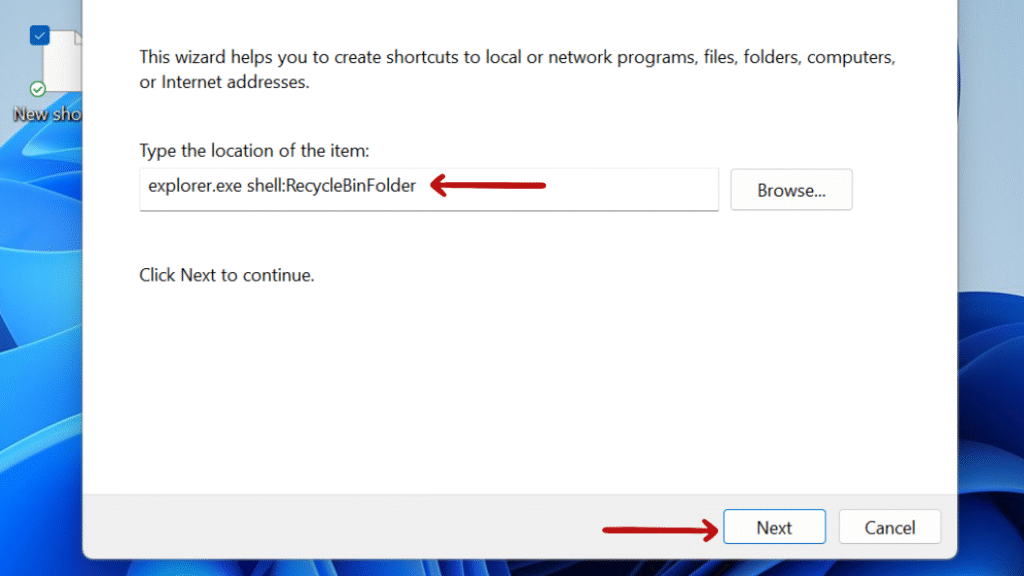
If you want a personalized desktop experience and want to create a custom shortcut for the Recycle Bin, you can use any icon you like different from the default Windows icon. This shortcut works just like the original Recycle Bin, which allows you easily to access deleted files, but it shows a fresh look and new icon.
Step 1: Right-click on an empty spot on your desktop, then select New > Shortcut.
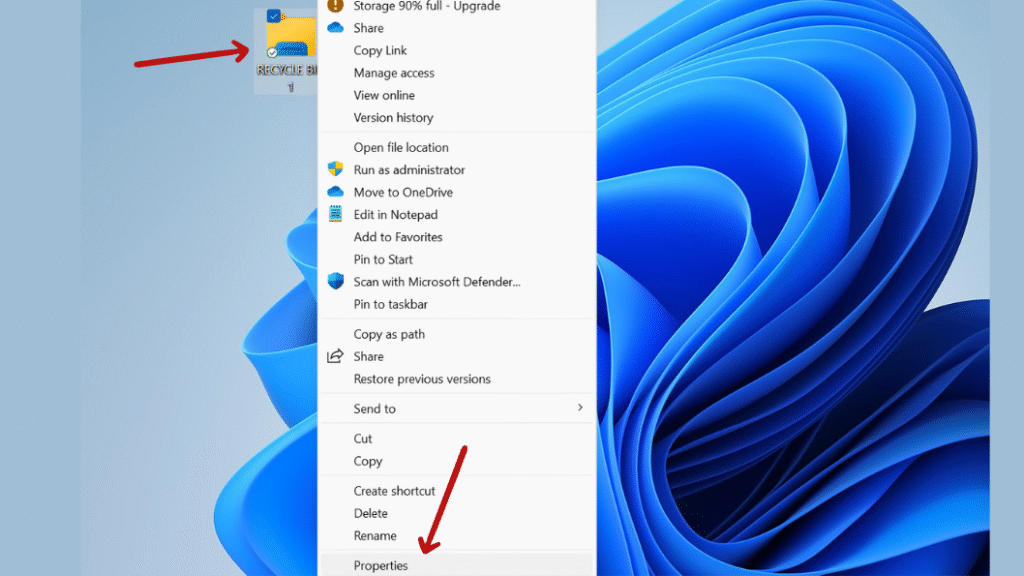
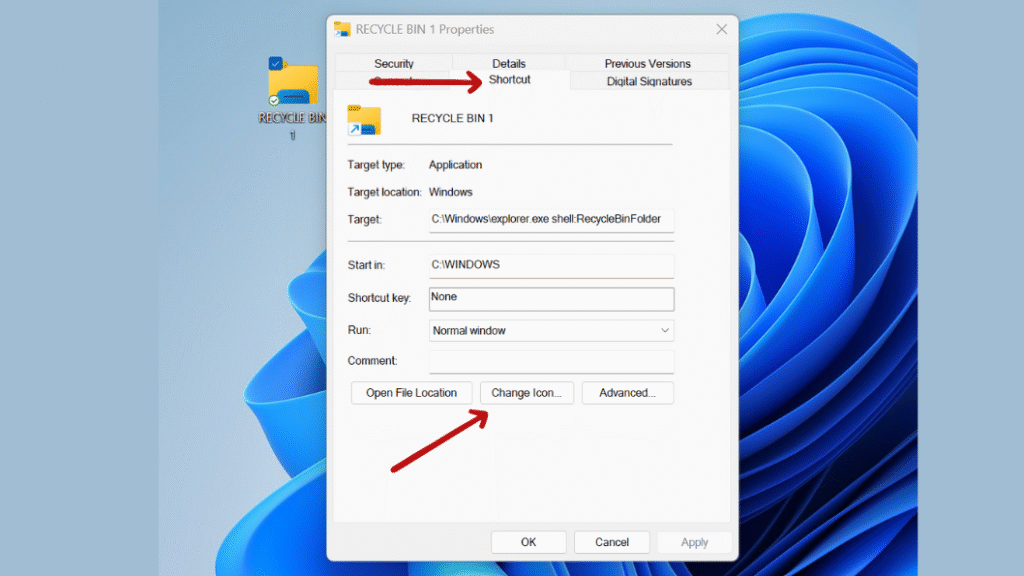
Step 4: Right-click the new shortcut and select Properties.
Step 5: Under the Shortcut tab, click Change Icon, browse to select your preferred .ico file or choose from the default icons, then click OK, Apply, and OK again.
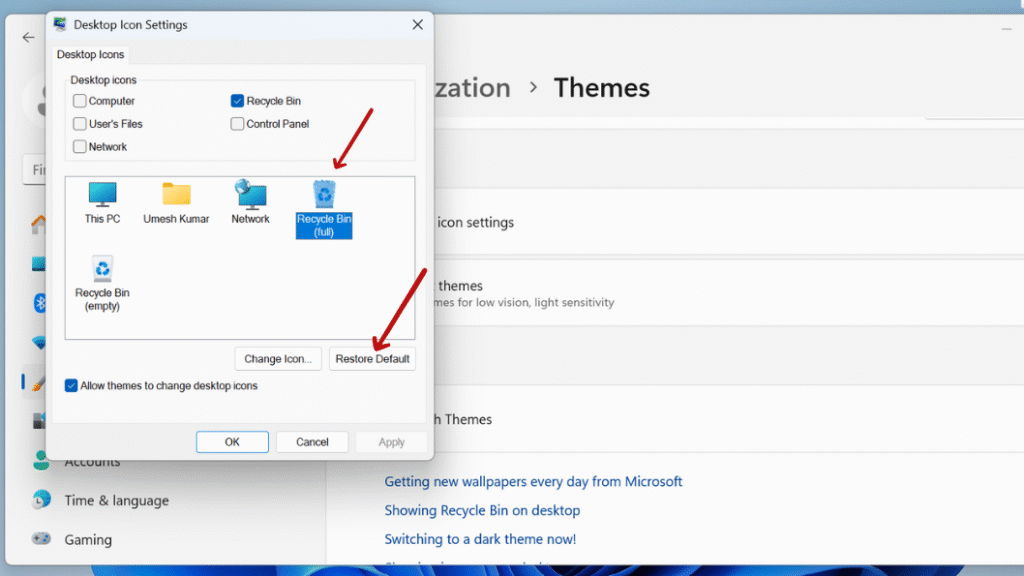
If you’ve created a customize recycle bin icon on your desktop or your recycle bin icon is missing or corrupted and want to revert it back to the original default icon, you can easily restore it through Windows’ Desktop Icon Settings. This method brings your recycle bin icon familiar and consistent with the standard Windows appearance.
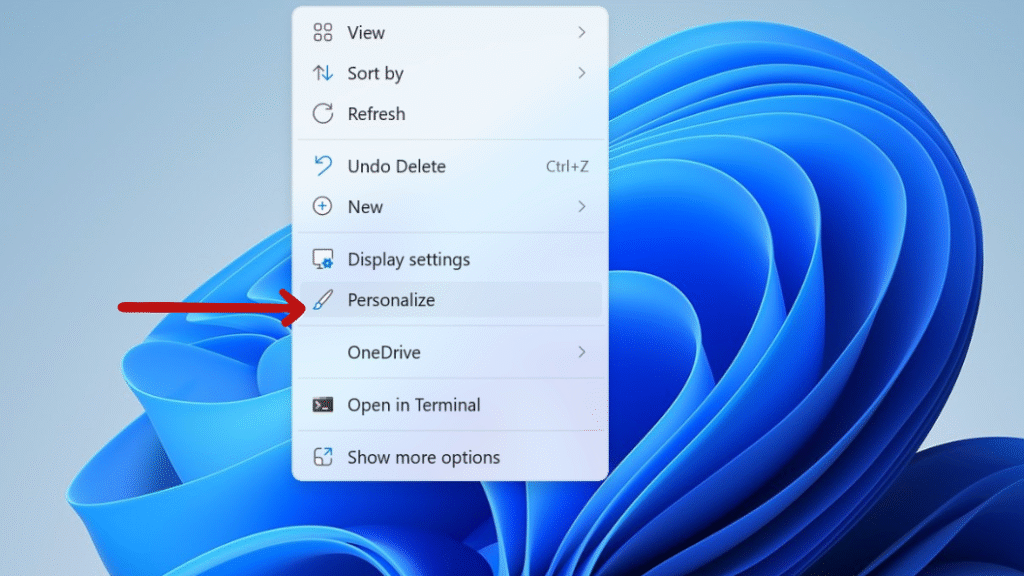
Step 1: Right-click on the desktop and select Personalize.
Step 2: In the Personalization window, click Themes from the left sidebar.
Step 3: Scroll down and click Desktop icon settings under the Related settings section.
Step 4: In the Desktop Icon Settings window, select Recycle Bin (full) or Recycle Bin (empty) depending on which icon you want to restore.
Step 5: Click the Restore Default button.
Step 6: Click Apply, then OK to save the changes.
If you’ve changed or restored your Recycle Bin icon but don’t see the update immediately, try these steps to fix the issue:
Step 1: Right-click on an empty area of the desktop and select Refresh or press F5.
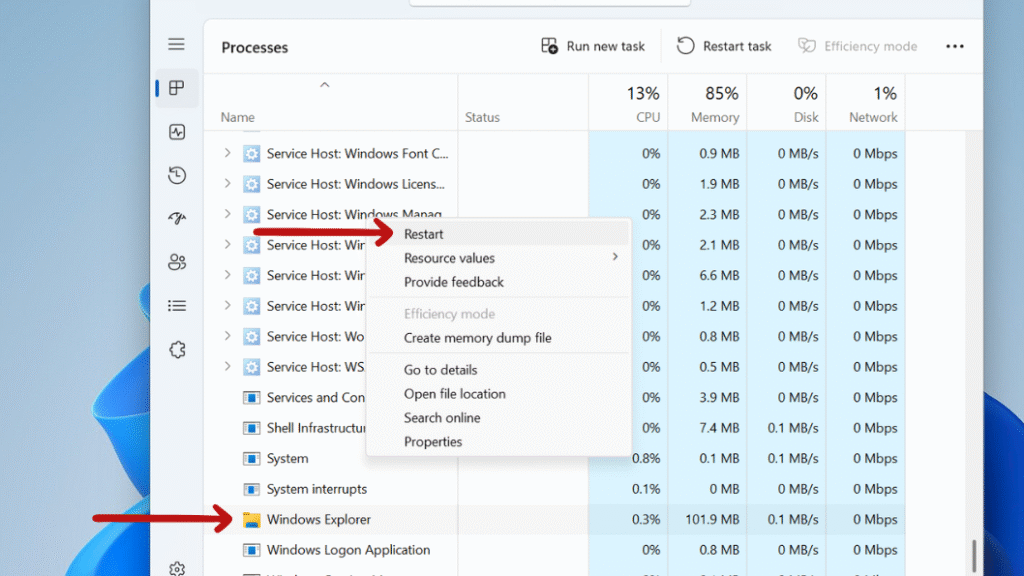
Step 2: Press Ctrl + Shift + Esc to open Task Manager, then find Windows Explorer, right-click it, and select Restart.
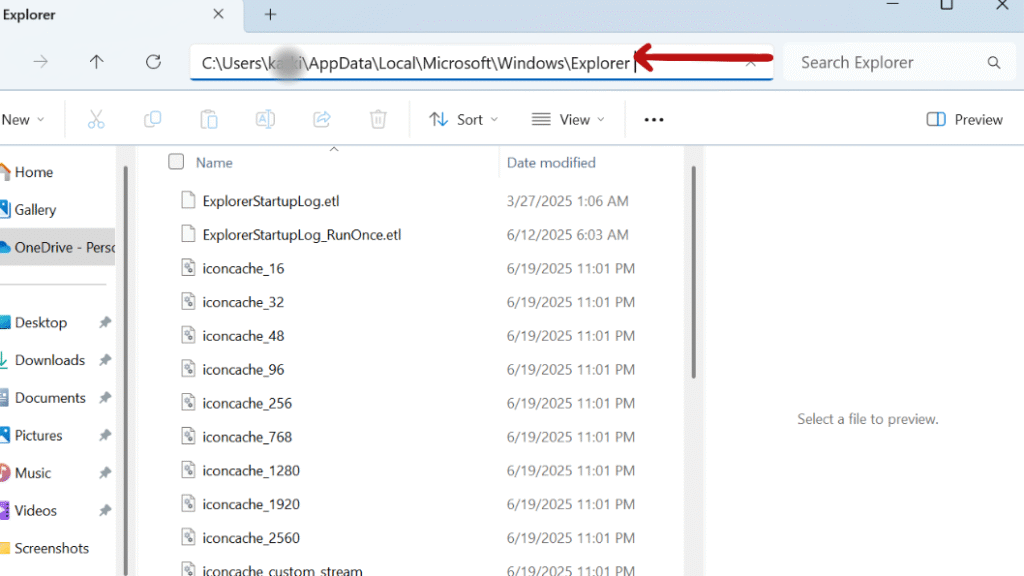
Step 4: Then find and delete the file named IconCache.db, and restart your computer to rebuild the icon cache.
Step 5: Check that your icons are in .ico format, and restart your computer.
Step 6: Click Apply, then OK to save the changes.