Windows 11: How to Allow or Prevent Users from Deleting Diagnostic Data

Windows collects diagnostic data to enhance security, troubleshoot issues, and improve user experience. A majority of users have the freedom to remove personalized data such as session details, logs, and command history however, system admins may restrict this in certain situations. These policies are frequently implemented to achieve compliance requirements such as policies addressing data retention, to monitor user engagements like auditing or analyzing activity at the system level. Blocking the option to remove data allows administrators to capture critical information pertaining to security, legal and commercial activities, and powerful systems.
If you want privacy on your device or if you are an IT administrator who organize multiple computers, this guide will explain how to manage users’ permissions for deleting diagnostic data in Windows 11.

What Is Diagnostic Data in Windows 11?

Diagnostic data in Windows 11 refers to information collected by the device to help Microsoft understand how your device is working. This diagnosis may include the device’s hardware, the system configuration, as well as basic checks to ensure that everything is functioning optimally. It may also include the following information like:

  •  Configuration of networks and devices
  • System and application performance metrics
  • Application usage analytics
  • Update history for software
  • System error reporting and crash feedback


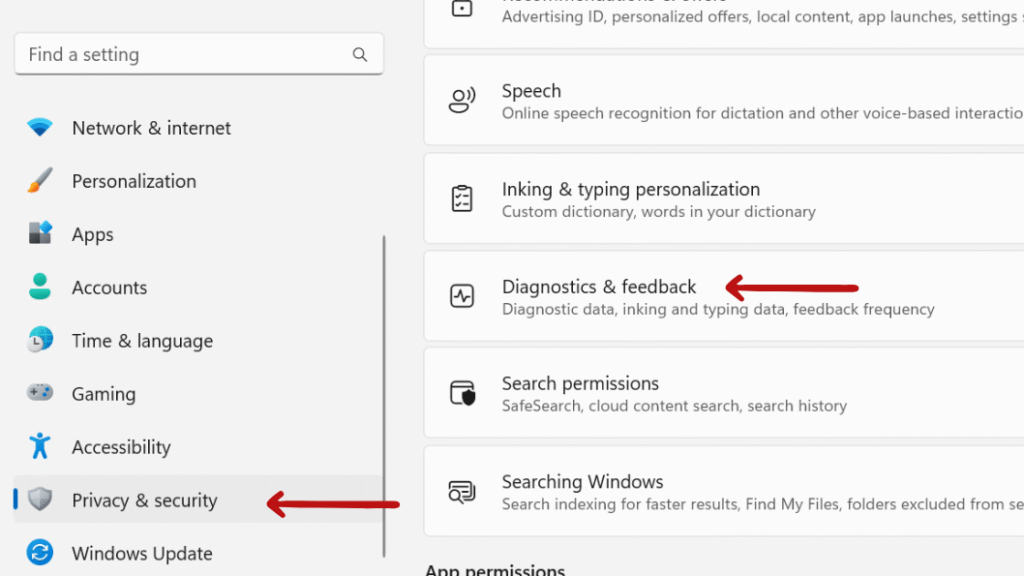
Windows 11 allows the user to delete this data via the Settings application which provides them with more control and privacy. On the other hand, organizational IT administrators may want to restrict user privacy in business environments for policy or compliance reasons.

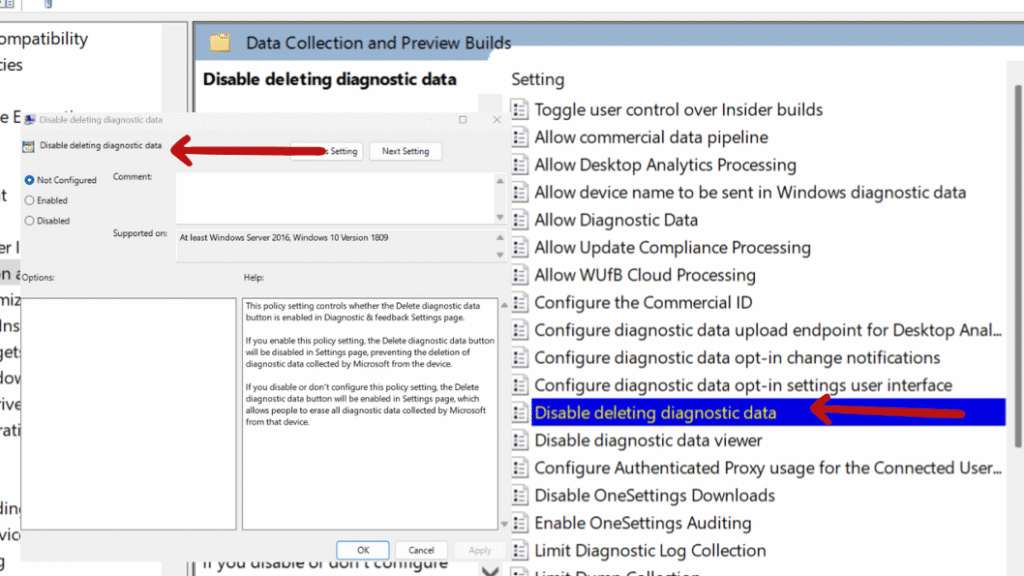
Method 1: Using Group Policy Editor (For Windows 11 Pro and above)

If you’re using Windows 11 Pro, Enterprise, or Education, you can use the Group Policy Editor to prevent users from deleting diagnostic data. This tool gives system administrators control over many system settings that includes privacy and data collection options.
Step 1: Press Windows + R to open the Run dialog box Then, type gpedit.msc and press Enter. This opens the Group Policy Editor that allows you to configure advanced settings and system policies which is usually used by IT admins to manage how Windows behaves on a device.
diagnostic data
Step 2: Go to Computer Configuration > Administrative Templates > Windows Components > Data Collection and Preview Builds
Step 3: Double-click “Disable Delete Diagnostic Data” to open the settings window for that specific policy. This setting controls whether users are allowed to delete the diagnostic data that Windows collects.
Step 4: Set it to “Enabled”, then click Apply and OK to save the policy setting. This will prevent users from deleting diagnostic data through the Settings app.

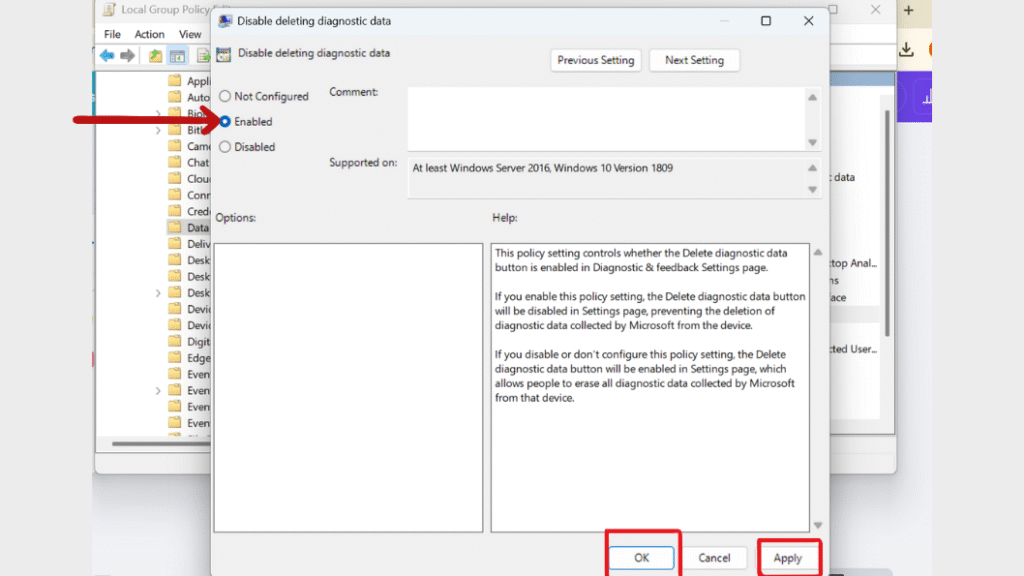
Step 5: Restart the device to apply the changes.

If you don’t want to restart your device, you can open Command Prompt and run the command gpupdate /force, which manually refreshes all Group Policy settings which immediately save your time and make the change right away.

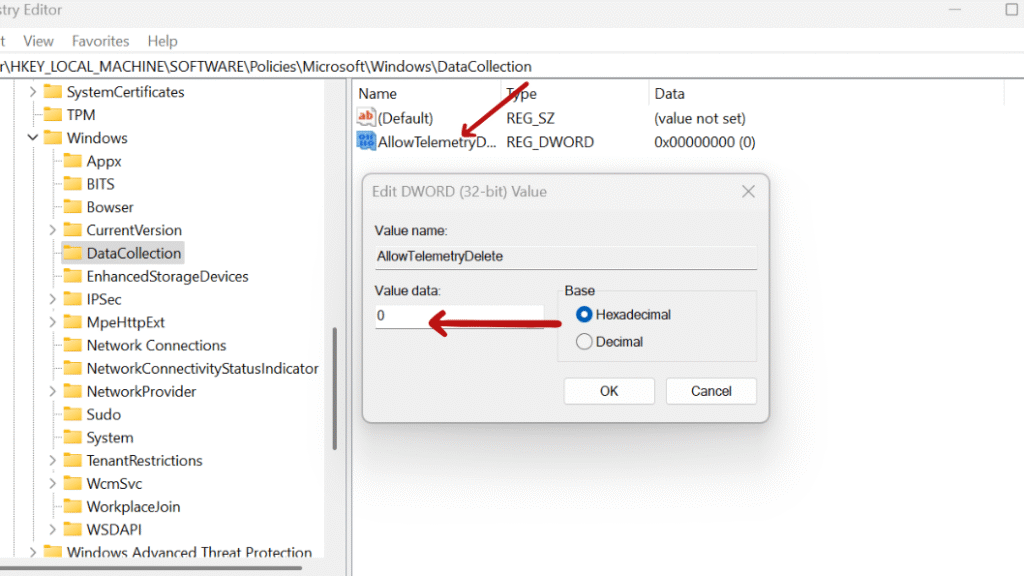
Method 2: Prevent Data Deletion Using Windows Registry Editor (All Editions)

If you don’t have access to the Group Policy Editor by default which is common in Windows 11 Home edition, you can still control diagnostic data deletion by editing the Windows Registry. You can use this method for all Windows editions, but you should back up before you make any changes to the registry, as they can affect your system.
Step 1: Press Windows + R to open the Run dialog box, type regedit, and press Enter.
diagnostic data
Step 2: Navigate to the following key: HKEY_LOCAL_MACHINE\SOFTWARE\Policies\Microsoft\Windows\DataCollection
Step 3: If the DataCollection folder doesn’t exist, right-click on Windows, select New > Key, and name it DataCollection.

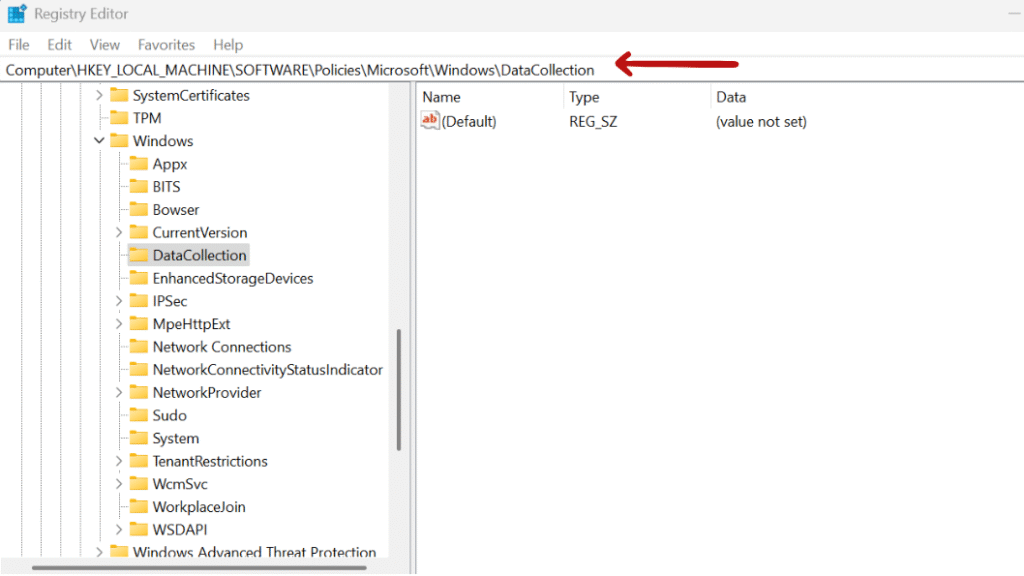
Step 4:• Inside DataCollection, right-click on the right pane, select New > DWORD (32-bit) Value, and name it AllowTelemetryDelete.

Step 5: Double-click AllowTelemetryDelete and set its value to 0 to disable deletion of diagnostic data.
Step 6: Click OK and close the Registry Editor and restart your computer for the changes to take effect.

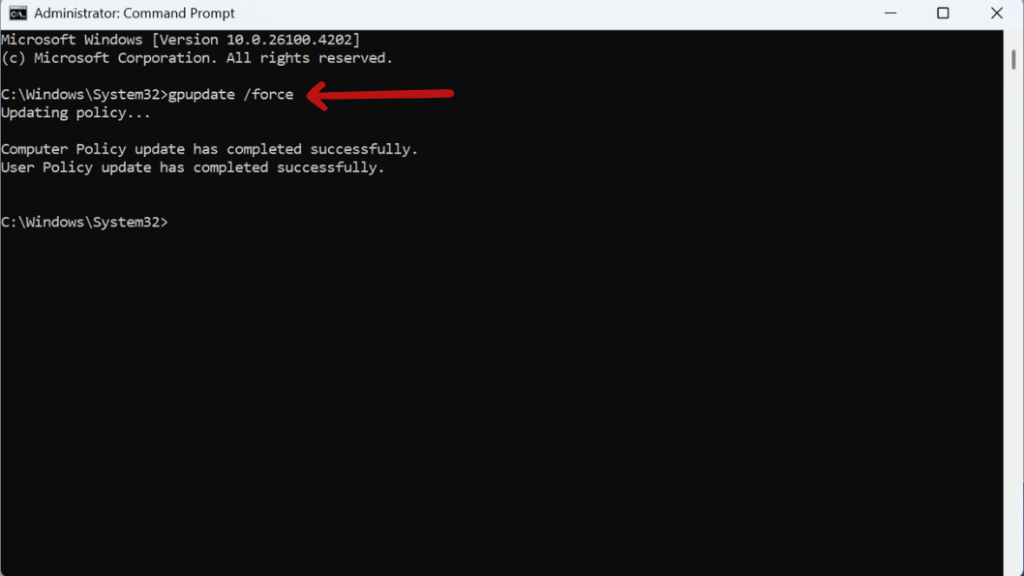
How to Verify That the Setting Has Taken Effect

If you want to verify that the settings preventing users from deleting diagnostic data, follow these steps.
Step 1: Press Windows + I to Open Windows Settings and go to Privacy & Security > Diagnostics & Feedback.
Step 2: Look for the option to Delete diagnostic data.If the policy or registry change was successful, this option should be grayed out or unavailable, which prevent users from deleting the data.

Final Thought: How to Allow or Prevent Users from Deleting Diagnostic Data

Controlling user ability to delete diagnostic data in Windows 11 is important for both privacy and policy enforcement. Whether you’re an individual user who values data transparency or an IT administrator who ensures compliance across multiple systems, the Group Policy Editor and Registry Editor provide effective tools to manage this.

As described in this guide, you have the power to manage diagnostic data with full control to provide a more secure and consistent experience on your Windows devices.

Still confused or stuck about How to Allow or Prevent Users from Deleting Diagnostic Data ? Leave your questions in the comments or call me at +1– 844-405-0212. I am here to help!

Stay updated with more at www.365dayson.com !

Leave a Comment