6 Windows 11 Registry Tweaks Every Tech-Savvy User Should Apply

The Windows Registry is a powerful tool that allows you to customize your Windows 11 far beyond the standard settings. With a few modifications to the registry, you can unlock hidden features, improve performance, and customize Windows 11 to your liking. However, editing the Registry comes with risks, and a wrong change can cause system instability. It is advised to always back up your Registry before making changes.
In this blog post I will show you six powerful registry tweaks that make your Windows 11 system more responsive and customized the way you want it to.

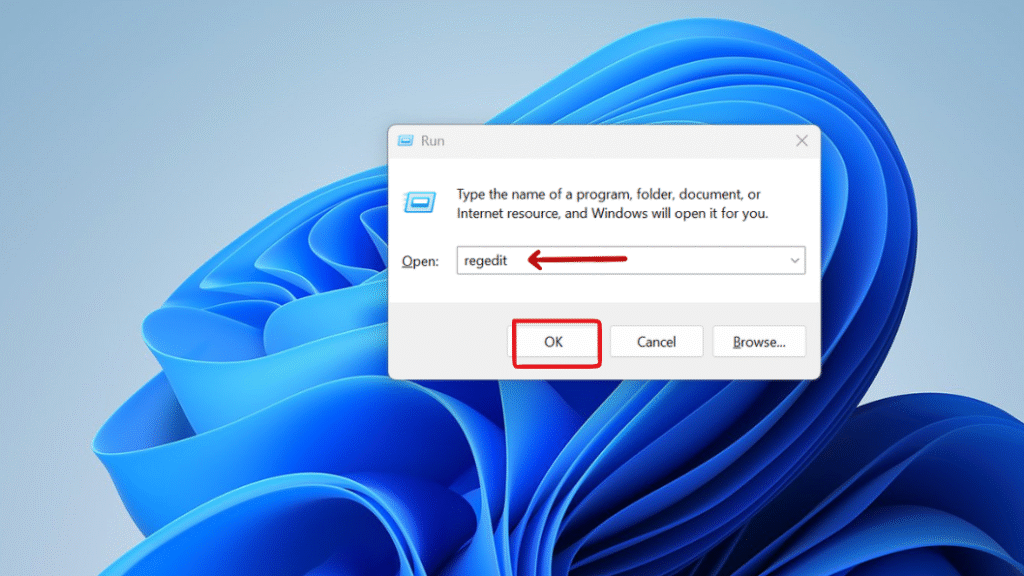
Method 1: Disable Windows 11’s Context Menu Delay

In Windows 11, you might have experienced a slight delay before the right-click menu pops up on the desktop or in File Explorer. This delay is meant to allow smoother animations, but for advanced users or IT engineers, it can feel sluggish. If you make the modification in the registry, it will remove that artificial delay, making the context menu appear instantly when right-clicked.
Step 1: Press Windows + R, type regedit, and press Enter to open the Registry Editor.
Registry Editor
Step 2: Navigate to the following key: HKEY_CURRENT_USER\Control Panel\Desktop
registry tweaks

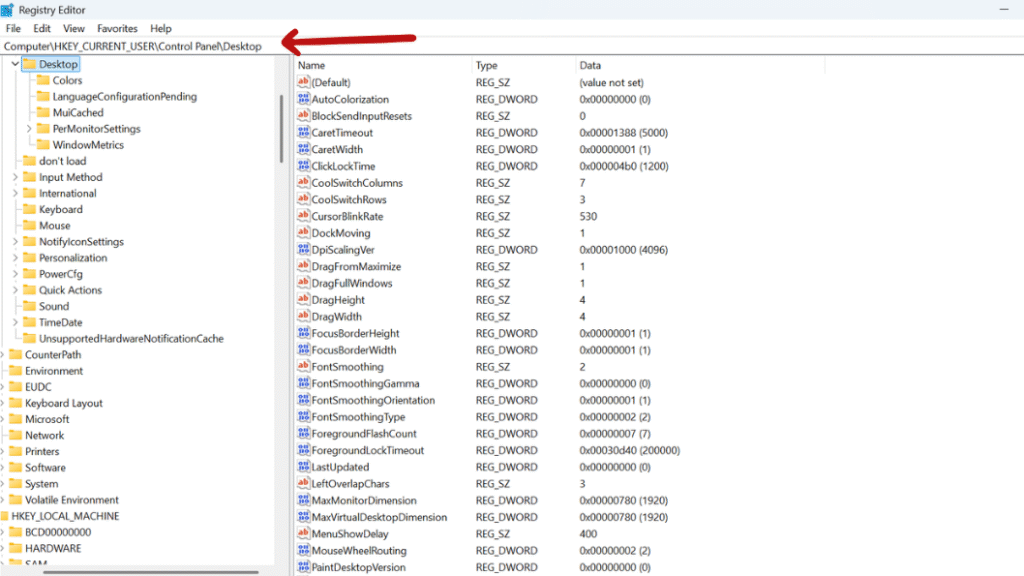
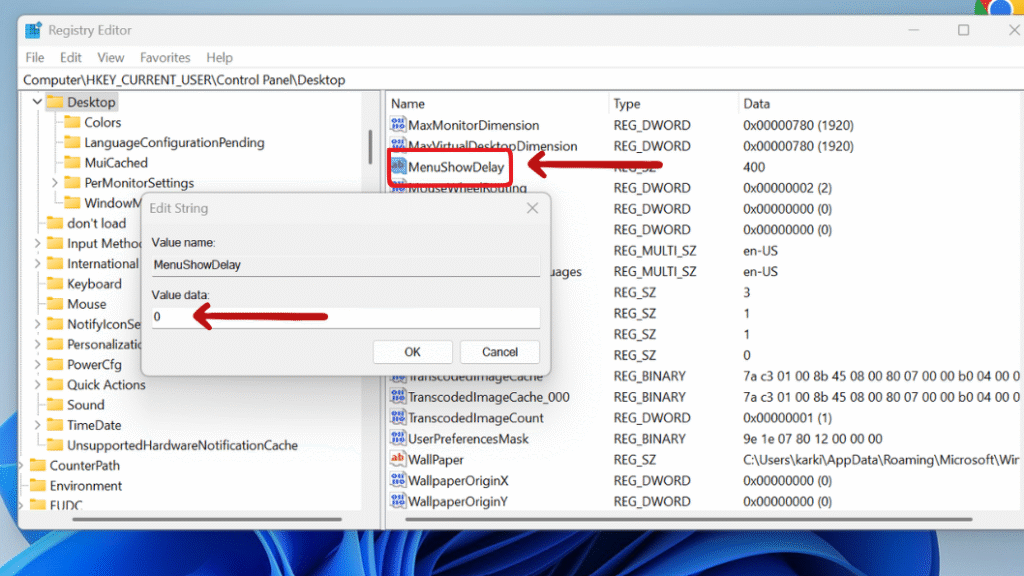
Step 3: In the right pane, find the entry named MenuShowDelay
If it doesn’t exist, right-click in the right pane and select:
New > String Value, then name it MenuShowDelay.
Double-click MenuShowDelay and change the Value data to: 0

Step 4: Click OK and close the Registry Editor and Restart your PC.
If you reduce or eliminate the menu delay, it will significantly improve your system responsiveness It is best for users who frequently do right-click to navigate, organize files, or access Windows’s tools. It makes your windows smoother and more responsive and perfect for productivity focused workflows.

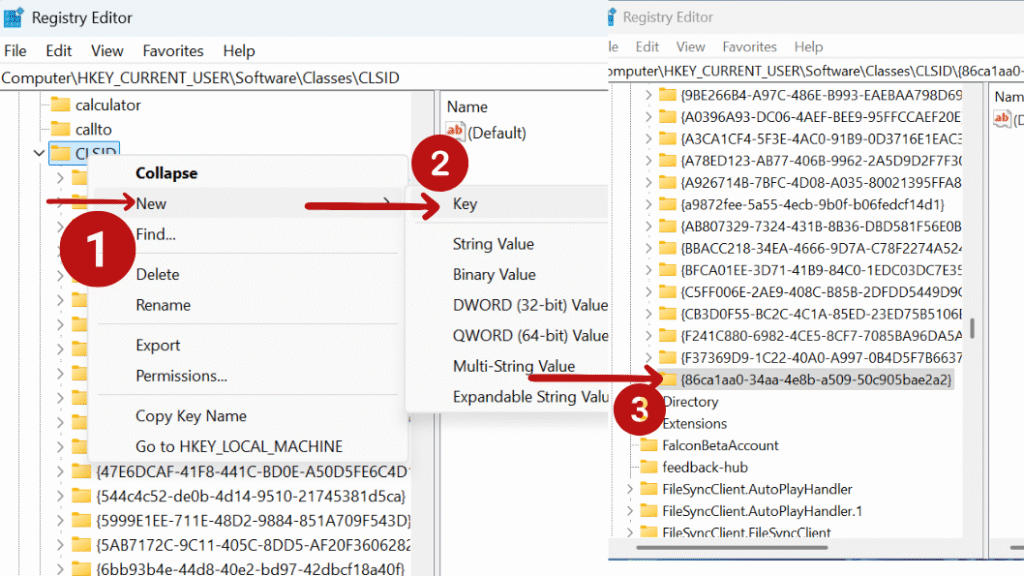
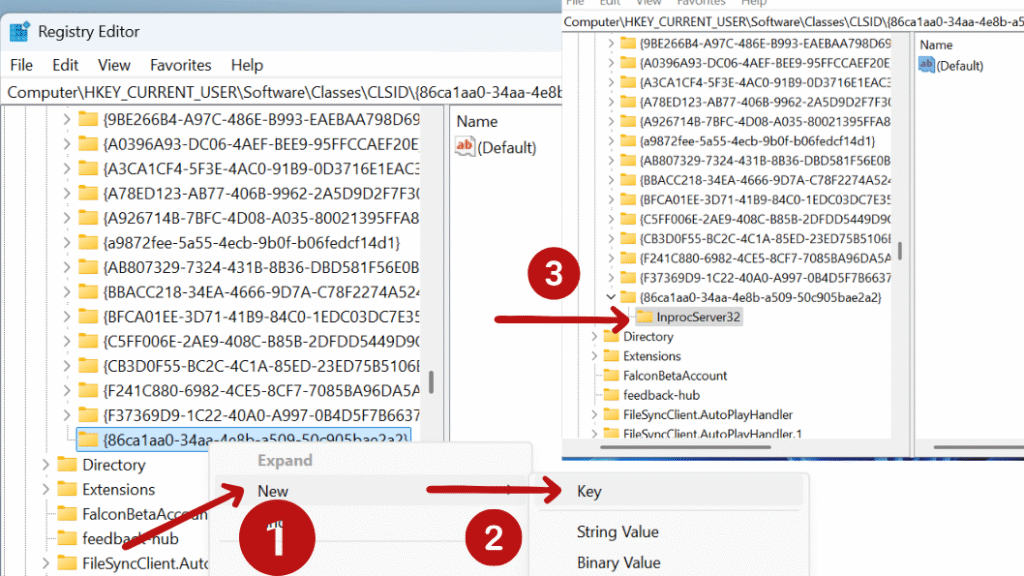
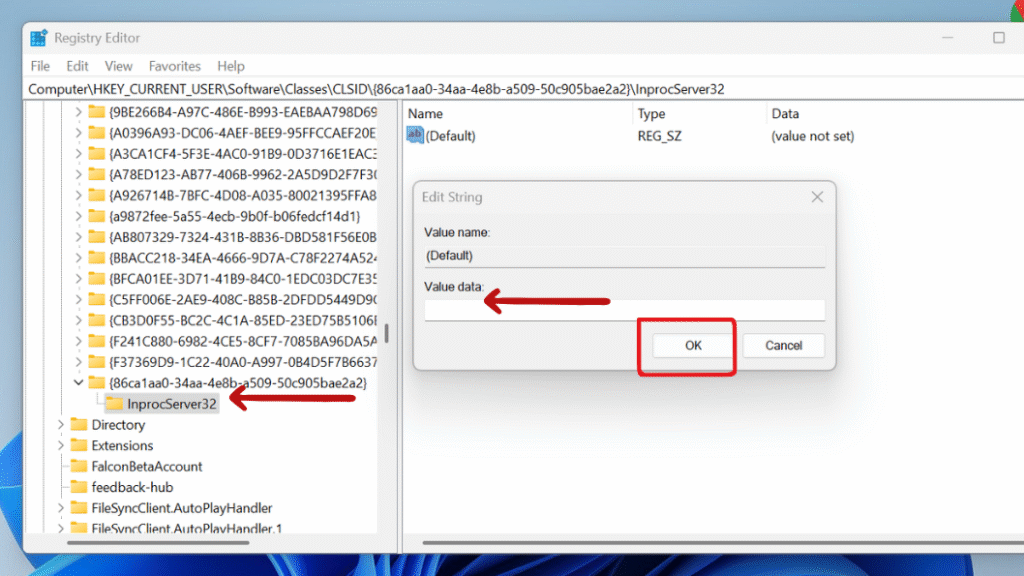
Method 2: Enable the Classic Right-Click Menu in Windows 11

In Windows 11, you can find a redesigned right-click (context) menu that hides many familiar options behind a “Show more options” submenu (or Shift + Right Click). This design seems nicer for normal users, but it becomes less effective for advanced users or IT engineers who need high speed. If you make the modification in the registry, it will restore the Windows 10-style menu that shows all options immediately.
Step 1: Press Windows + R, type regedit, and press Enter to open the Registry Editor.
Registry Editor
Step 2: Navigate to this registry key: HKEY_CURRENT_USER\Software\Classes\CLSID

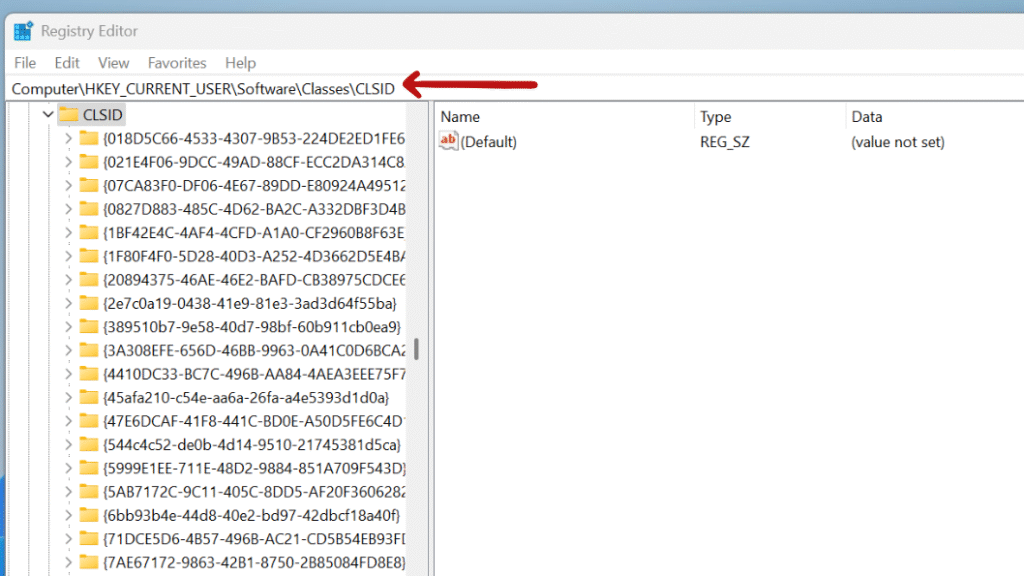
Step 3: Right-click on CLSID, choose New > Key, and name it:
{86ca1aa0-34aa-4e8b-a509-50c905bae2a2}

Step 4: Right-click on that new key, choose New > Key again, and name it: InprocServer32
Step 5: With InprocServer32 selected, double-click the (Default) value, leave it blank, click OK, then close the Registry Editor and restart your computer.
This modification removes the need to click “Show more options” every time you right-click which automatically save your time and clicks. It will restore the faster, more functional right-click similar to Windows 10 which is basically useful for developers, or IT engineers.

Method 3: Unlock Hidden File Explorer Features

In Windows 11 you can find File Explorer in a modern look which hides certain legacy features and interface options that some users still prefer or rely on. This small modification enables a hidden feature, which includes access to classic layouts, command bar changes, and enhanced folder views that Microsoft may have hidden by default.
Step 1: Press Windows + R, type regedit, and press Enter to open the Registry Editor.
Registry Editor
Step 2: Navigate to this registry key: HKEY_LOCAL_MACHINE\SOFTWARE\Microsoft\Windows\CurrentVersion\Shell Extensions
Step 3: Right-click on Shell Extensions, select New > Key, and name it: Blocked

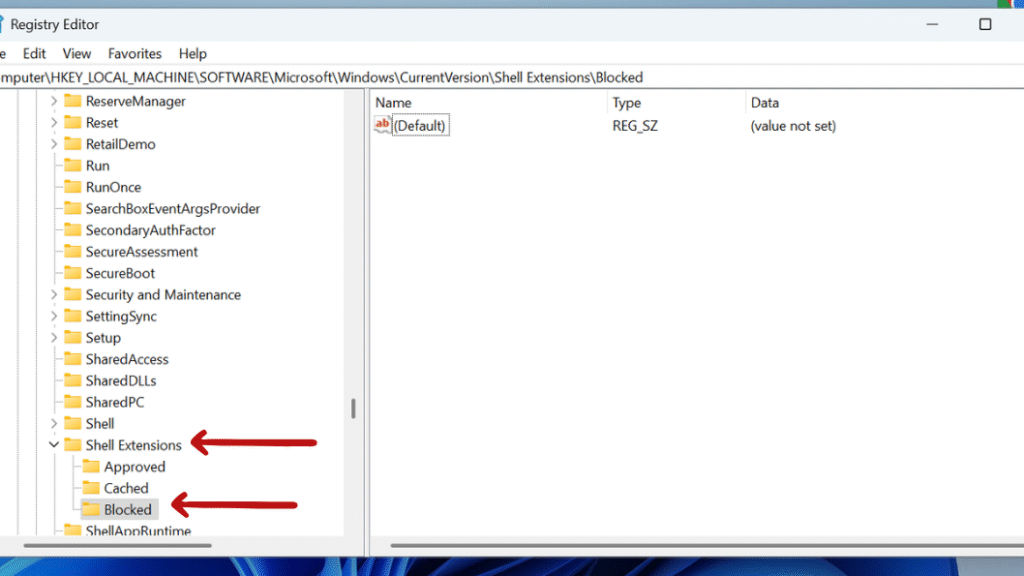
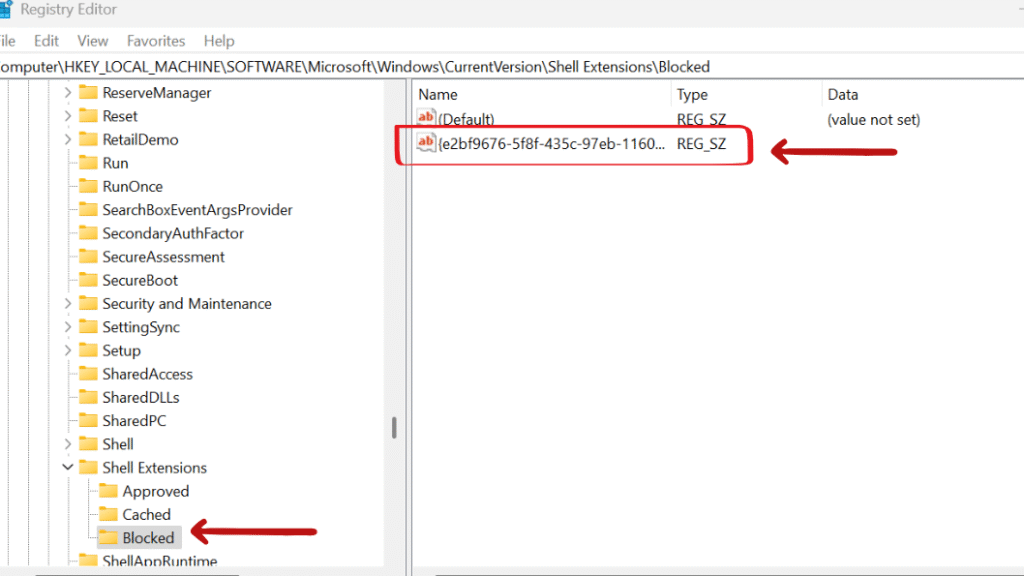
Step 4: Select Blocked, right-click in the right pane, choose New > String Value, and name it:
{e2bf9676-5f8f-435c-97eb-11607a5bedf7}

Step 5: Close the Registry Editor and restart File Explorer (or restart your PC).
This modification in registry disables Microsoft’s newer simplified UI shell extension which restores older and more features of File Explorer functionality. It also includes the full ribbon interface for some users. It’s basically helpful for advanced or IT Engineers who prefer more control over file management and access to advanced tools.

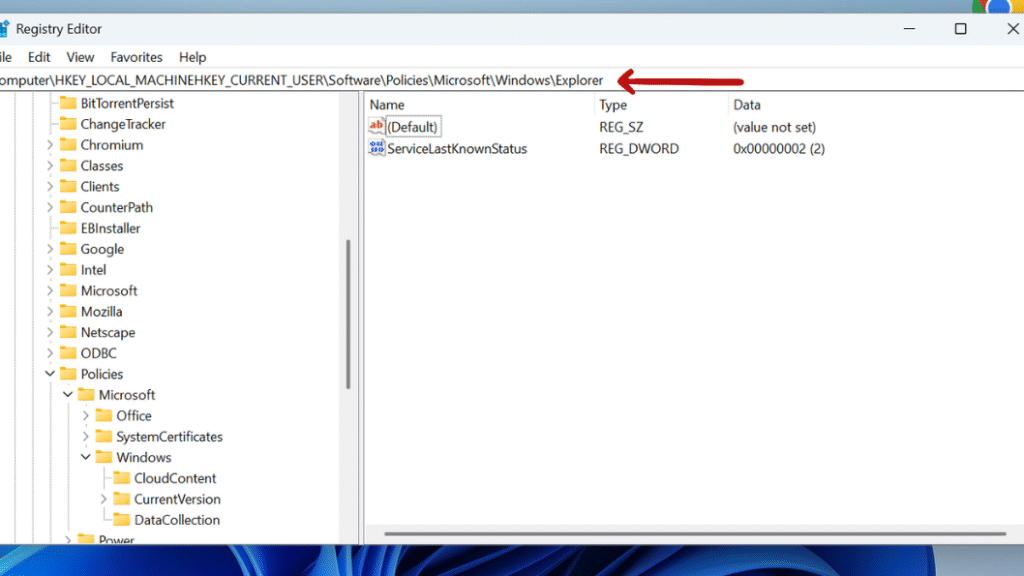
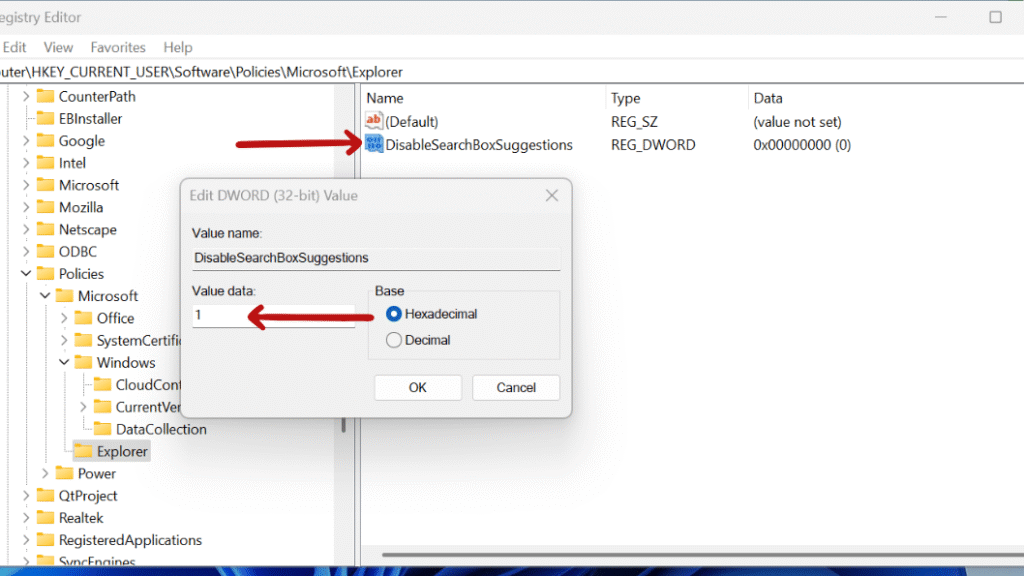
Method 4: Disable Bing Search in the Start Menu

When you search from the Start Menu in Windows 11, Microsoft sends your query to Bing search by default which directly opens in web results with local search. This may slow down your search result but can also raise privacy concerns. If you make the modification to disables Bing web search integration from start menu, it will only show local results like apps, files, and settings.
Step 1: Press Windows + R, type regedit, and press Enter to open the Registry Editor.
Registry Editor

Step 2: Navigate to this registry key:
HKEY_CURRENT_USER\Software\Policies\Microsoft\Windows\Explorer

Step 3: If the Explorer key doesn’t exist, right-click the Windows key, choose New > Key, and name it Explorer.

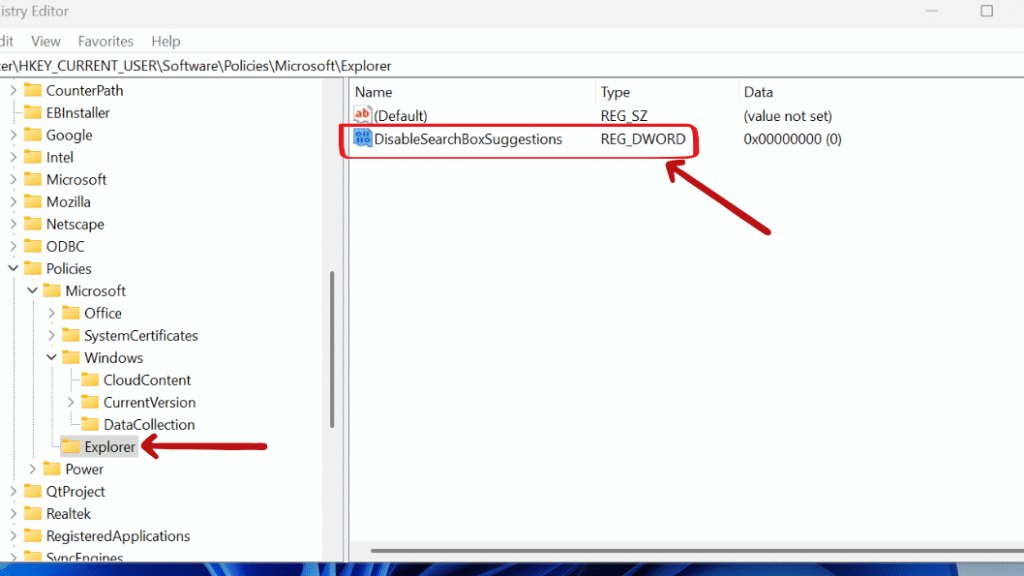
Step 4: In the Explorer key, right-click the right pane and choose:
New > DWORD (32-bit) Value
Name it: DisableSearchBoxSuggestions

Step 5: Double-click on DisableSearchBoxSuggestions and set its Value data to: 1
Step 6: Click OK, close the Registry Editor, and restart your PC.
If you disable Bing Search results in the Start Menu, It will search local results like apps, files, and settings, improve speed, reduce distractions, and enhance privacy. It also stops queries from being sent to Microsoft servers.

Method 5: Disable Windows 11’s Ads & Suggested Content

In windows 11 you find pops up tips, app suggestions, and even light ads in places such as the Start menu, Settings, and Notifications. While labeled as suggestions, they often serve as ads for Microsoft services or apps from the Microsoft Store. This simple modification in registry disables those suggestions to give you a cleaner, less crowded user interface.
Step 1: Press Windows + R, type regedit, and press Enter to open the Registry Editor.
Registry Editor

Step 2: Navigate to this registry key:
HKEY_CURRENT_USER\Software\Microsoft\Windows\CurrentVersion\ContentDeliveryManager

Step 3: • In the right pane, look for these DWORD values and set each one to 0:
o SubscribedContent-338389Enabled
o SubscribedContent-338388Enabled
o SubscribedContent-338387Enabled
o SubscribedContent-310093Enabled
o SubscribedContent-314563Enabled

If any of these values don’t exist, right-click in the right pane, select New > DWORD (32-bit) Value, and create them manually and set all that values to 0.
Step 6: Click OK, close the Registry Editor, and restart your PC.
This modification in registry disables promotional content across Windows which removes ads from the lock screen, Start Menu, and Settings suggestions.

Method 6: Enable the Classic Volume Mixer

Windows 11 has replaced the classic volume mixer with a modern sound interface in the new Settings panel. While visually cleaner, it’s slower to access and lacks the quick control of the old mixer. This modification in registry restores the classic Windows 7/10 volume mixer, which allow you to adjust per-app volume instantly with fewer clicks.
Step 1: Press Windows + R, type regedit, and press Enter to open the Registry Editor.
Registry Editor
Step 2: Navigate to this registry key: HKEY_CLASSES_ROOT\Directory\Background\shell
Step 3: Right-click on shell, select New > Key, and name it: Classic Volume Mixer
Step 4: Inside Classic Volume Mixer create another key named:command
Step 5: Select the command key, and in the right pane, double-click (Default) and set its value to:SndVol.exe
Step 6: Click OK, close the Registry Editor, and restart your PC.

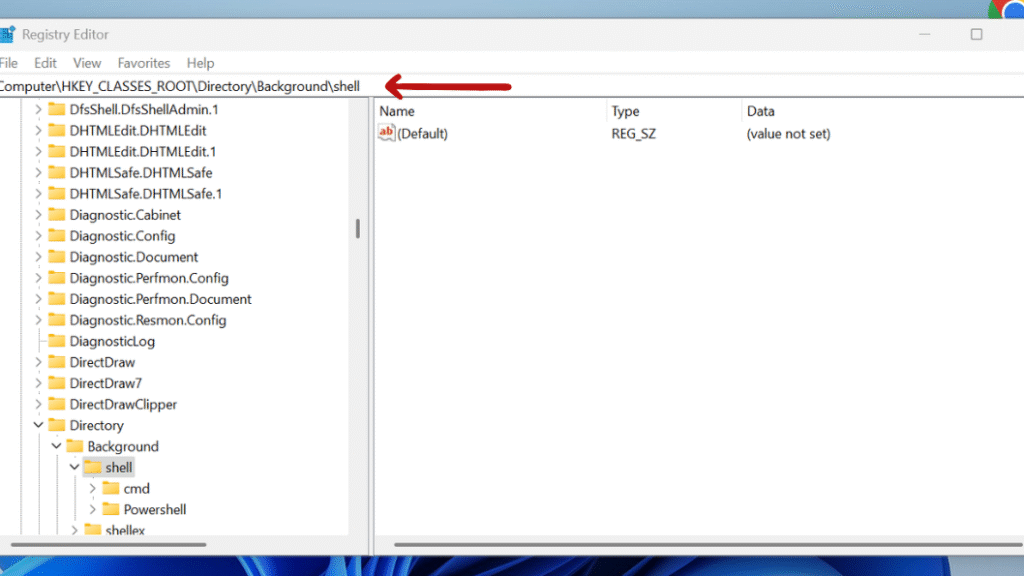
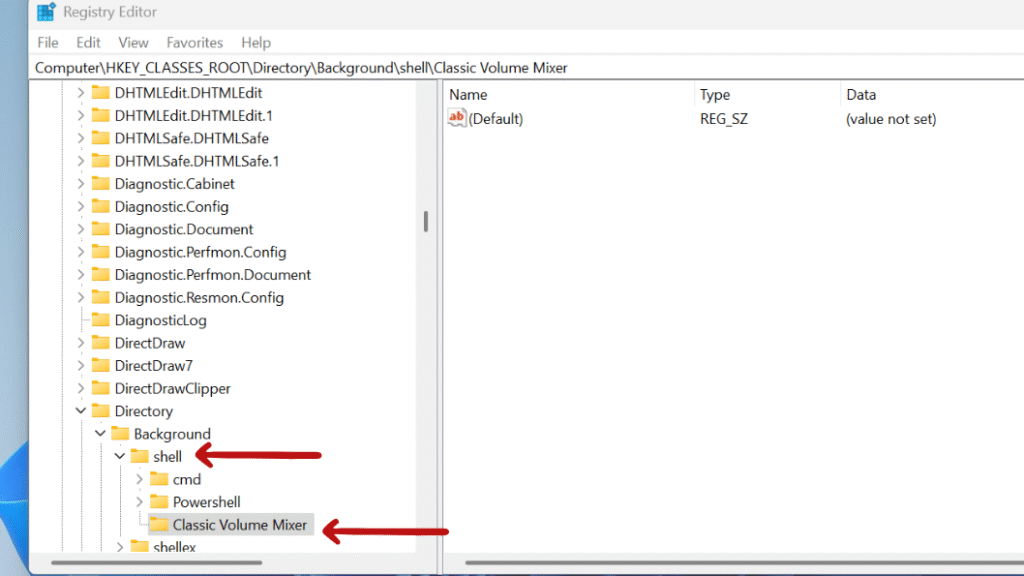
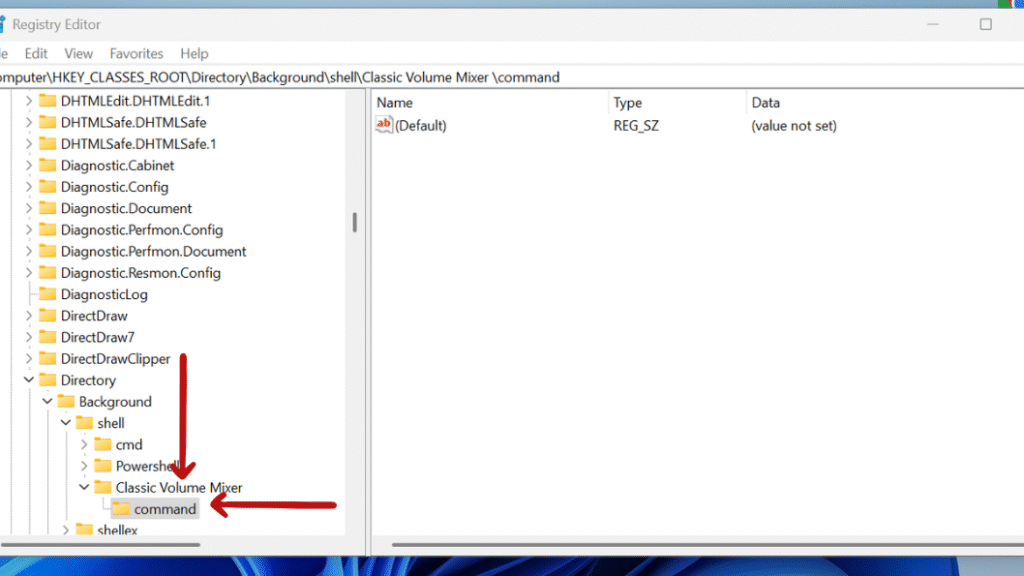
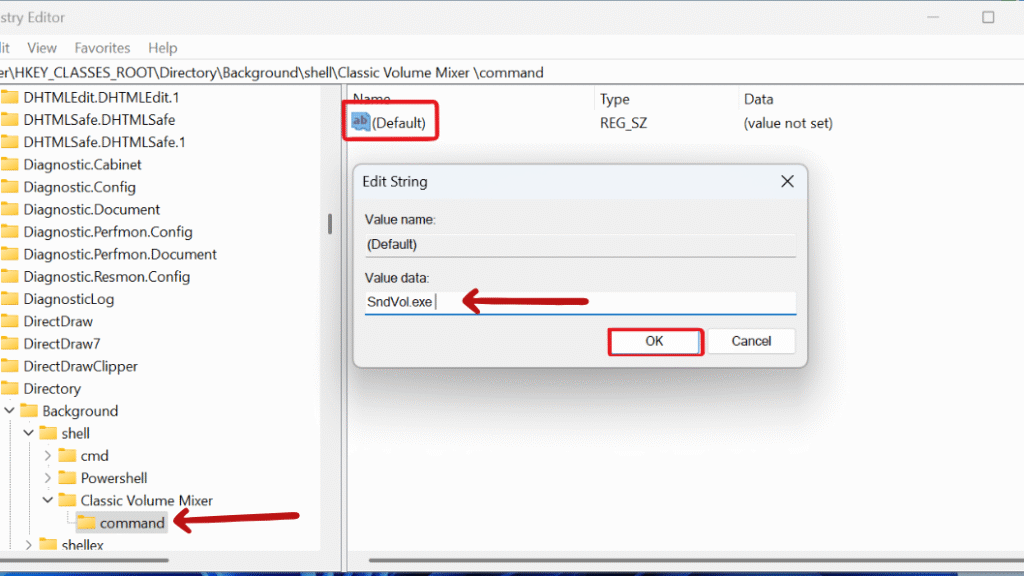
Now, when you right-click on the desktop background, you’ll see an option to open the Classic Volume Mixer.

This small modification in the registry brings fast access to the old style per-app volume controls, which are more straightforward for quick audio adjustments. It is basically useful for video streamers, gamers, or multitaskers who manage multiple audio sources.

Final Thought: 6 Registry Tweaks Every Tech-Savvy Windows 11 User Should Apply Today

Windows 11 has replaced the classic volume mixer with a modern sound interface in the new Settings panel. While visually cleaner, it’s slower to access and lacks the quick control of the old mixer. This modification in registry restores the classic Windows 7/10 volume mixer, which allow you to adjust per-app volume instantly with fewer clicks.

Still confused or stuck about 6 Registry Tweaks Every Tech-Savvy Windows 11 User Should Apply Today ? Leave your questions in the comments or call me at +1– 844-405-0212. I am here to help!

Stay updated with more at www.365dayson.com !

Leave a Comment